T_Assistant User Guide
T_Assistant is a desktop app for CS2103 tutors managing their students, groups and tasks optimized for use via a Command Line Interface (CLI) while still having the benefits of a Graphical User Interface (GUI).
If you can type fast, T_Assistant can get your tutor management tasks done faster than traditional GUI apps.
Navigation
For easy navigation, you can use the navigation breadcrumb on the right side of the website.
If you are on the PDF, use the table of contents below to navigate the site.
Quick start
Ensure you have Java
17or above installed in your Computer.Download the latest
.jarfile from here.Copy the file to the folder you want to use as the home folder for your T_Assistant.
Open a command terminal,
cdinto the folder you put the jar file in, and use thejava -jar t_assistant.jarcommand to run the application.
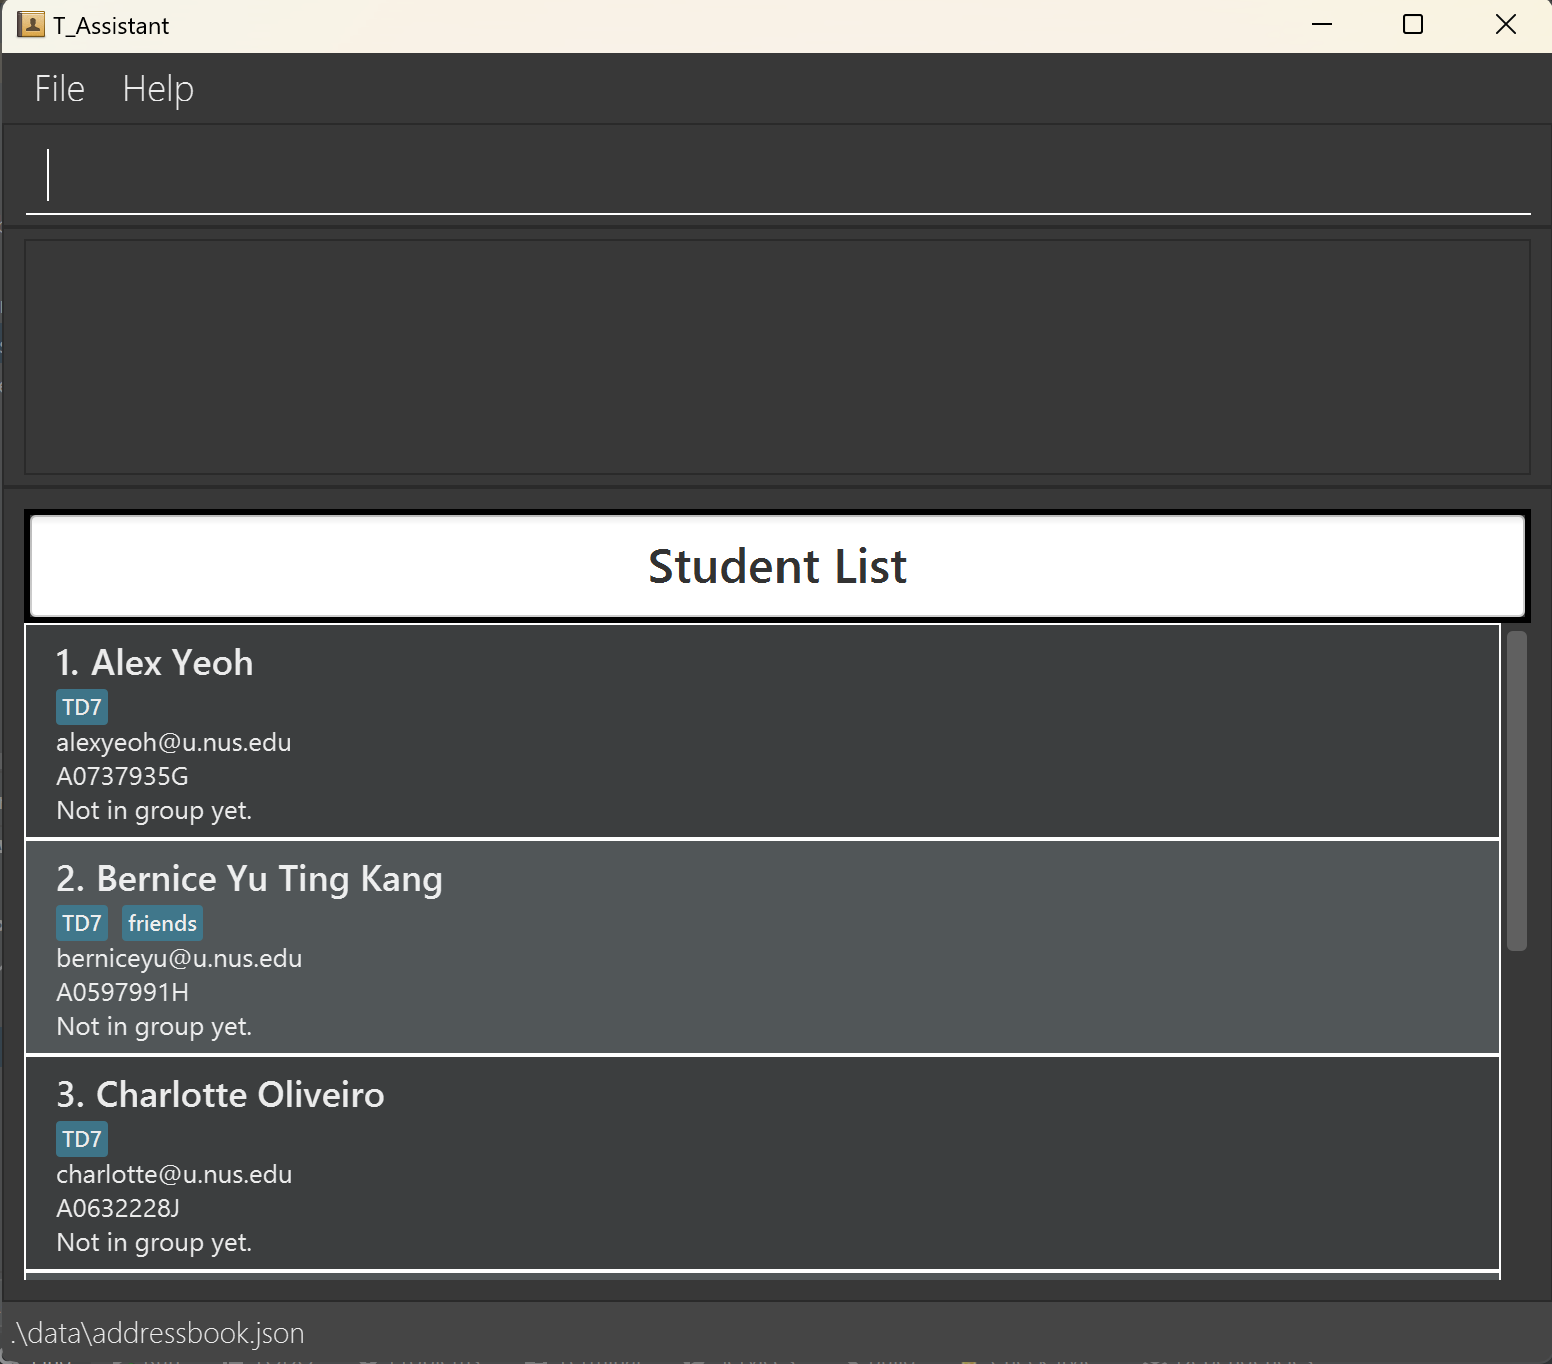
A GUI similar to the below should appear in a few seconds. Note how the app contains some sample data.
Type the command in the command box and press Enter to execute it. e.g. typing
helpand pressing Enter will open the help window.
Some example commands you can try:list_s: Lists all students.as sno/A0123456A sn/James Ho e/e0123456A@u.nus.edu t/TD9: Adds a student namedJames Hoto T_Assistant.undo: Undo the last command ran.clear: Deletes all data.exit: Exits the app.
Refer to the Features below for details of each command.
Features
Notes about the command format:
Command words are case-insensitive!
add_s ...andADD_S ...will both be recognised as commands to add a new student.Command words come with shorthands
e.g.add_s...andas...will both be recognised as commands to add a new student.Prefixes are case-insensitive!
e.g.i/INDEXandI/INDEXwill be recognised.Words in
UPPER_CASEare the parameters to be supplied by the user.
e.g. inas sn/STUDENT_NAME,STUDENT_NAMEis a parameter which can be used asas sn/John Doe.Items in square brackets are optional.
e.gsn/STUDENT_NAME [t/TAG]can be used assn/John Doe t/TD9or assn/John Doe.Items with
… after them can be used multiple times including zero times.
e.g.[t/TAG]…can be used as(i.e. 0 times),t/TD9,t/GoodatUI t/TeamLeadetc.Parameters can be in any order.
e.g. if the command specifiessno/STUDENT_NUMBER sn/STUDENT_NAME,sn/STUDENT_NAME sno/STUDENT_NUMBERis also acceptable.The following commands (i.e.
help,exitandclear) will ignore extraneous parameters.
e.g. if the command specifieshelp 123, it will be interpreted ashelp.The following commands (i.e.
list_s,list_gandsortcommands) will throw an error for extraneous parameters.Using extraneous parameters/repeated parameters, unlike stated, in other commands might result in an error!
Caution:
- Prefixes are detected if a space is in front of them, i.e.
gn/will be detected as a prefix if entered like this(space)gn/. - If your input involves a parameter used in the command, consider using a backslash like this
gn\.
Important
- If you are using a PDF version of this document, be careful when copying and pasting commands that span multiple lines as space characters surrounding line-breaks may be omitted when copied over to the application.
When running commands that use i/INDEX, the index used references the unfiltered lists so always run the relevant list commands first!
e.g. add_t tn/Merry Christmas td/2024-12-24 0000 will return a filtered view of the task.
However, if you wish to edit the new task, you must run list_t first to edit it globally or list_t gn/GROUP_NAME if you wish to edit it for a group.
Student Commands
Listing Students: list_s, ls
Shows a list of all students in the T_Assistant.
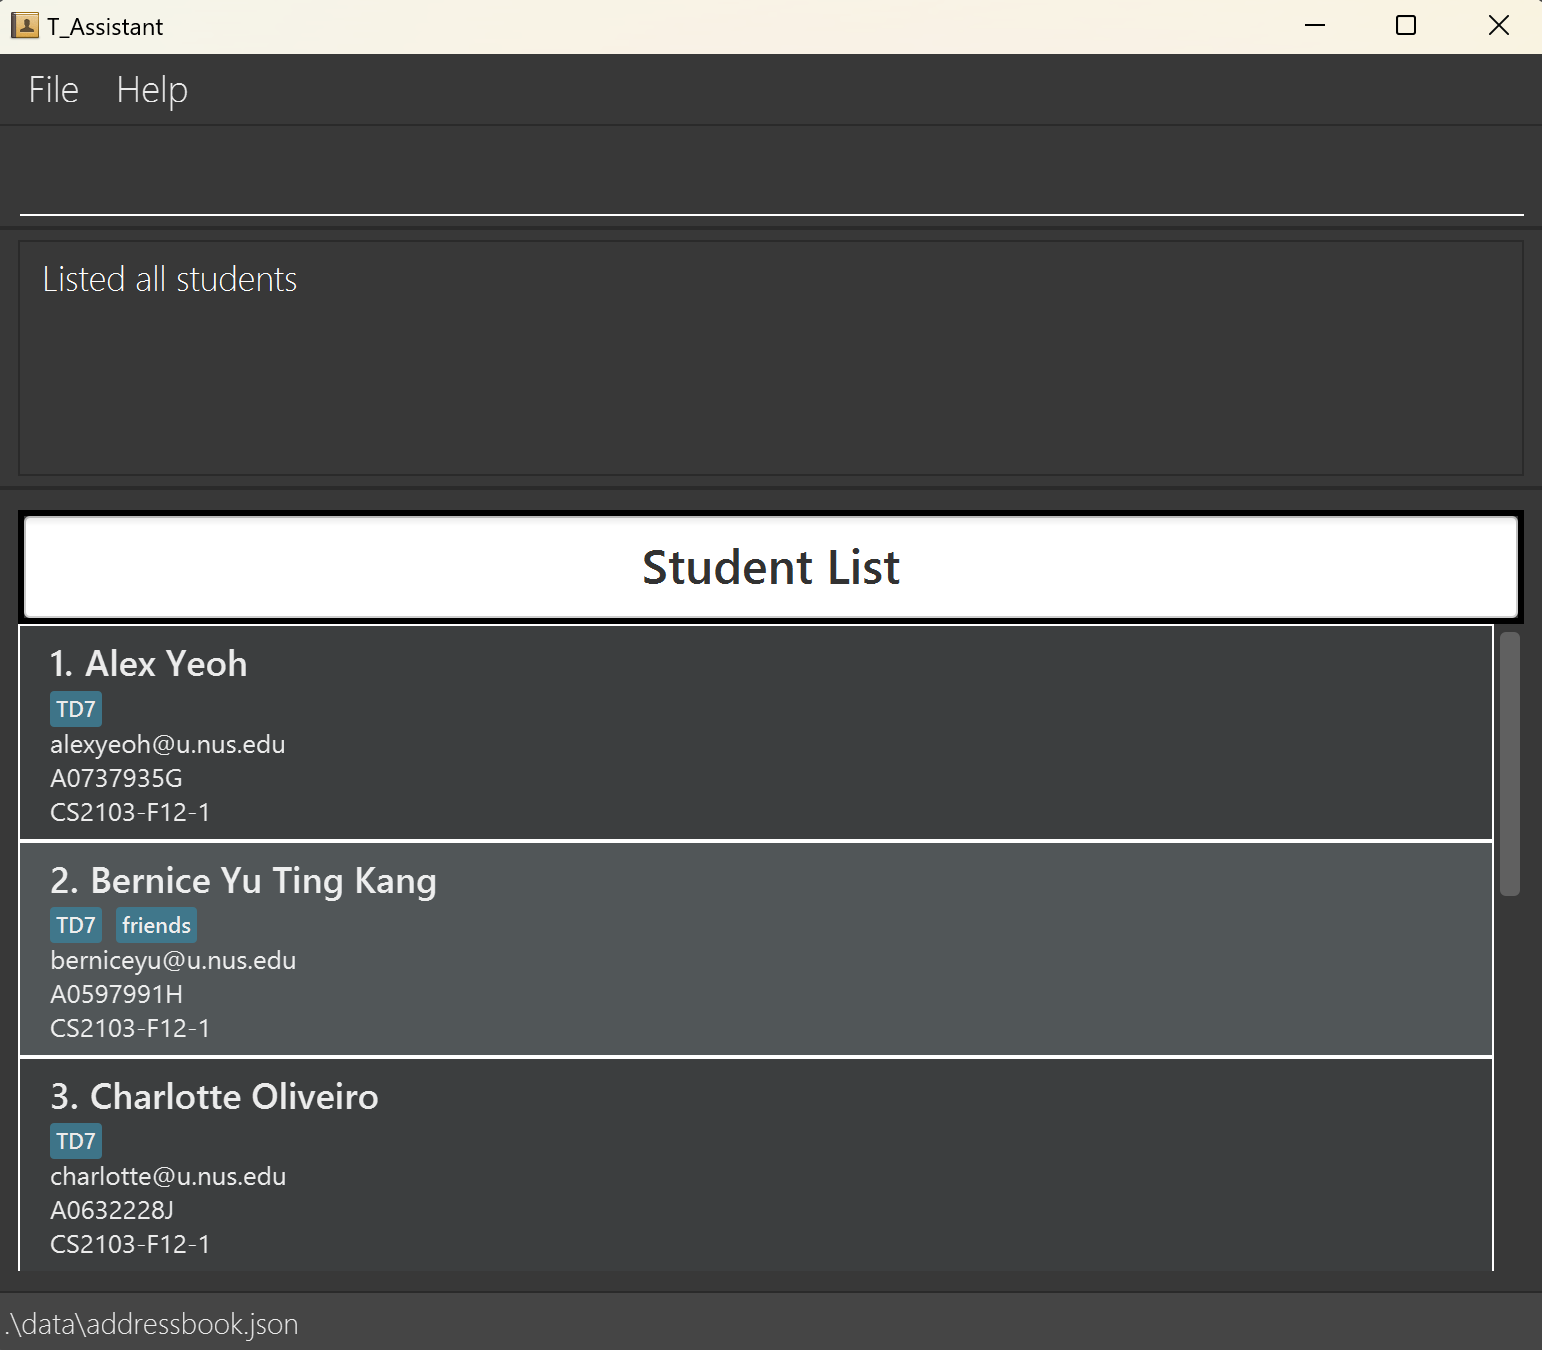
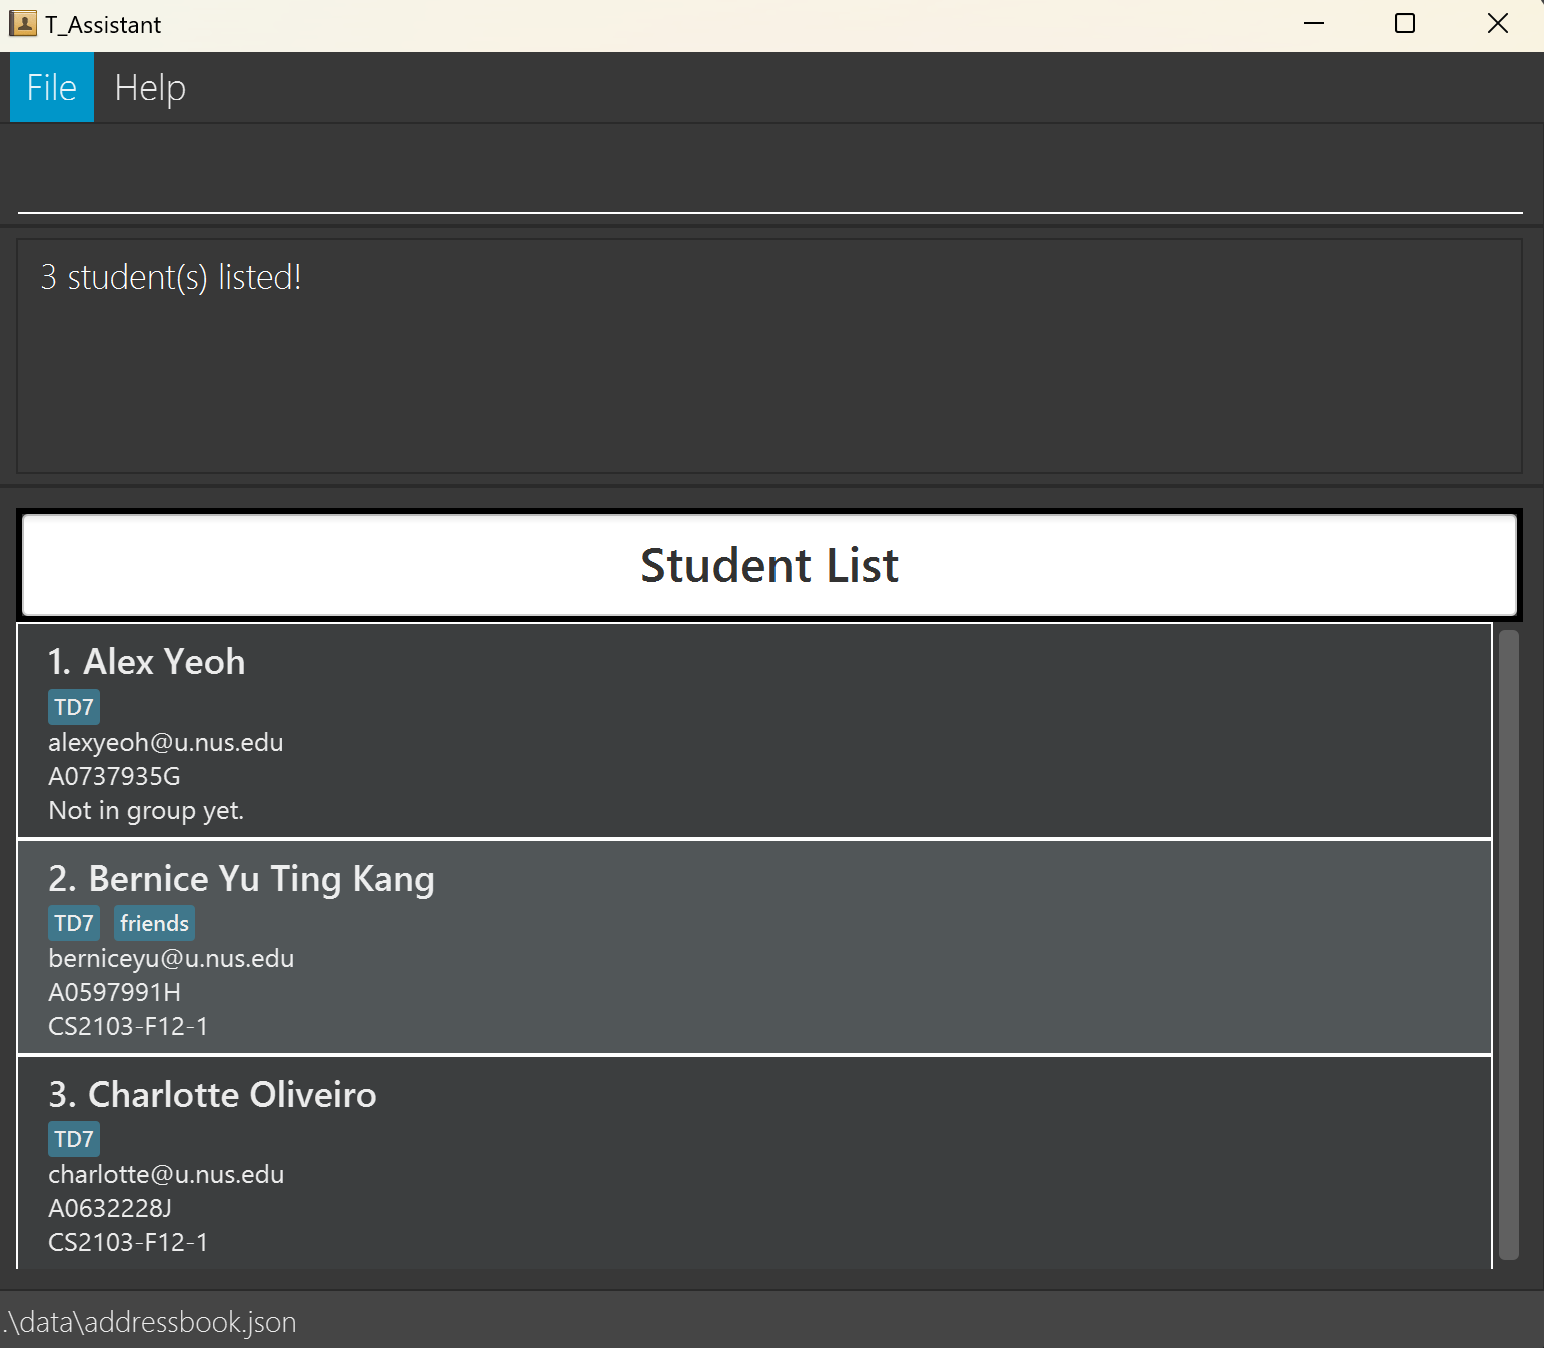
Format: list_s
This screenshot shows the result of executing list_s.
Adding a Student: add_s, as
Adds a student to T_Assistant.
Format: add_s sno/STUDENT_NUMBER sn/STUDENT_NAME e/EMAIL [t/TAG]...
Notes
Student NumberandEmailare the unique identifiers for each student, so no two students can have the same student number or email.Student Numberprovided by the user will be capitalised by the system.Tagsare case-insensitive, soT1andt1will be recognised as the same tags. T_Assistant will add the first instance of the repeated tag.- For information on the constraints for each parameter used in this command, go to Command Parameters.
Usage Scenario
Scenario #1: Adding James Ho to T_Assistant
- You can begin this command on any panel.
- Type and execute:
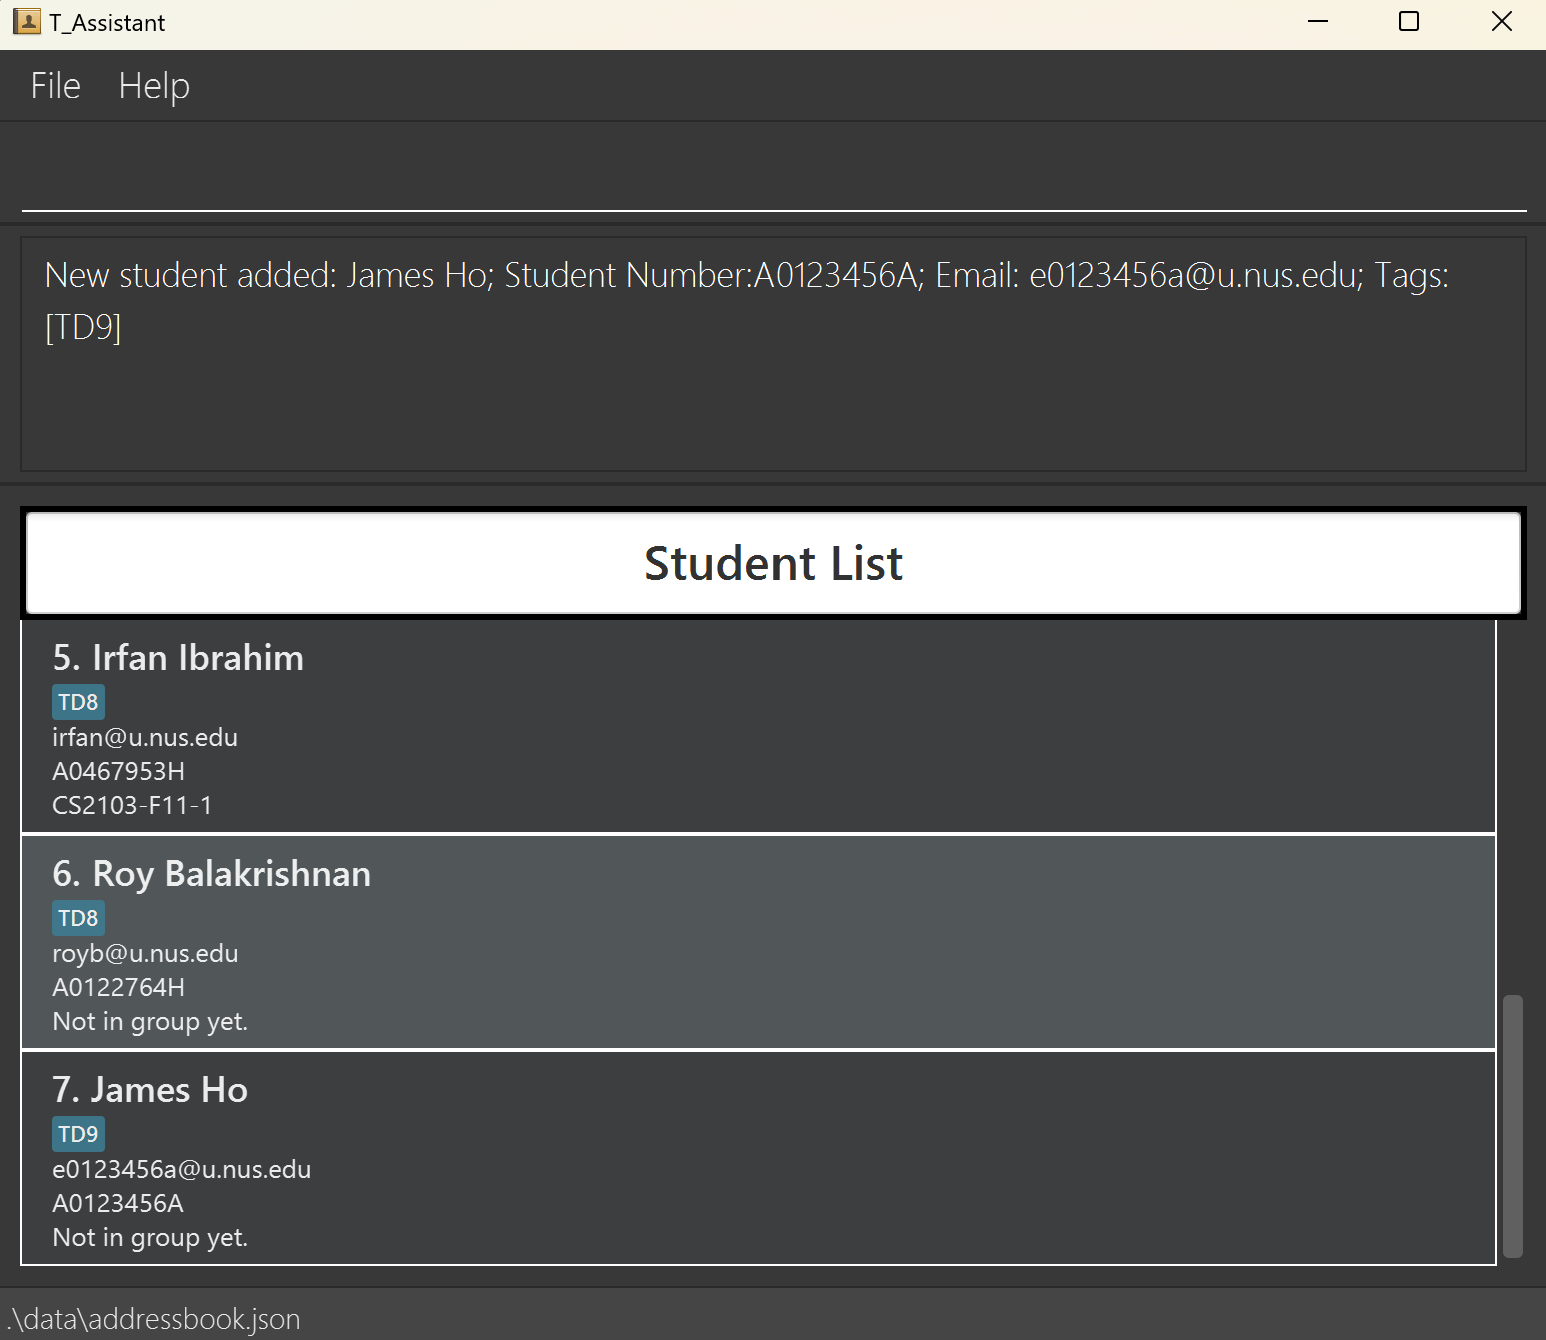
add_s sno/A0123456A sn/James Ho e/e0123456A@u.nus.edu t/TD9
This screenshot shows the result of executing add_s sno/A0123456A sn/James Ho e/e0123456A@u.nus.edu t/TD9.
Deleting a Student: del_s, ds
Deletes a student from T_Assistant.
Format: del_s sno/STUDENT_NUMBER
Notes
- A student with the
Student Numbermust exist in T_Assistant. - For information on the constraints for each parameter used in this command, go to Command Parameters.
Usage Scenario
Scenario #1: Deleting James Ho from T_Assistant
- You can begin this command on any panel.
- Type and execute:
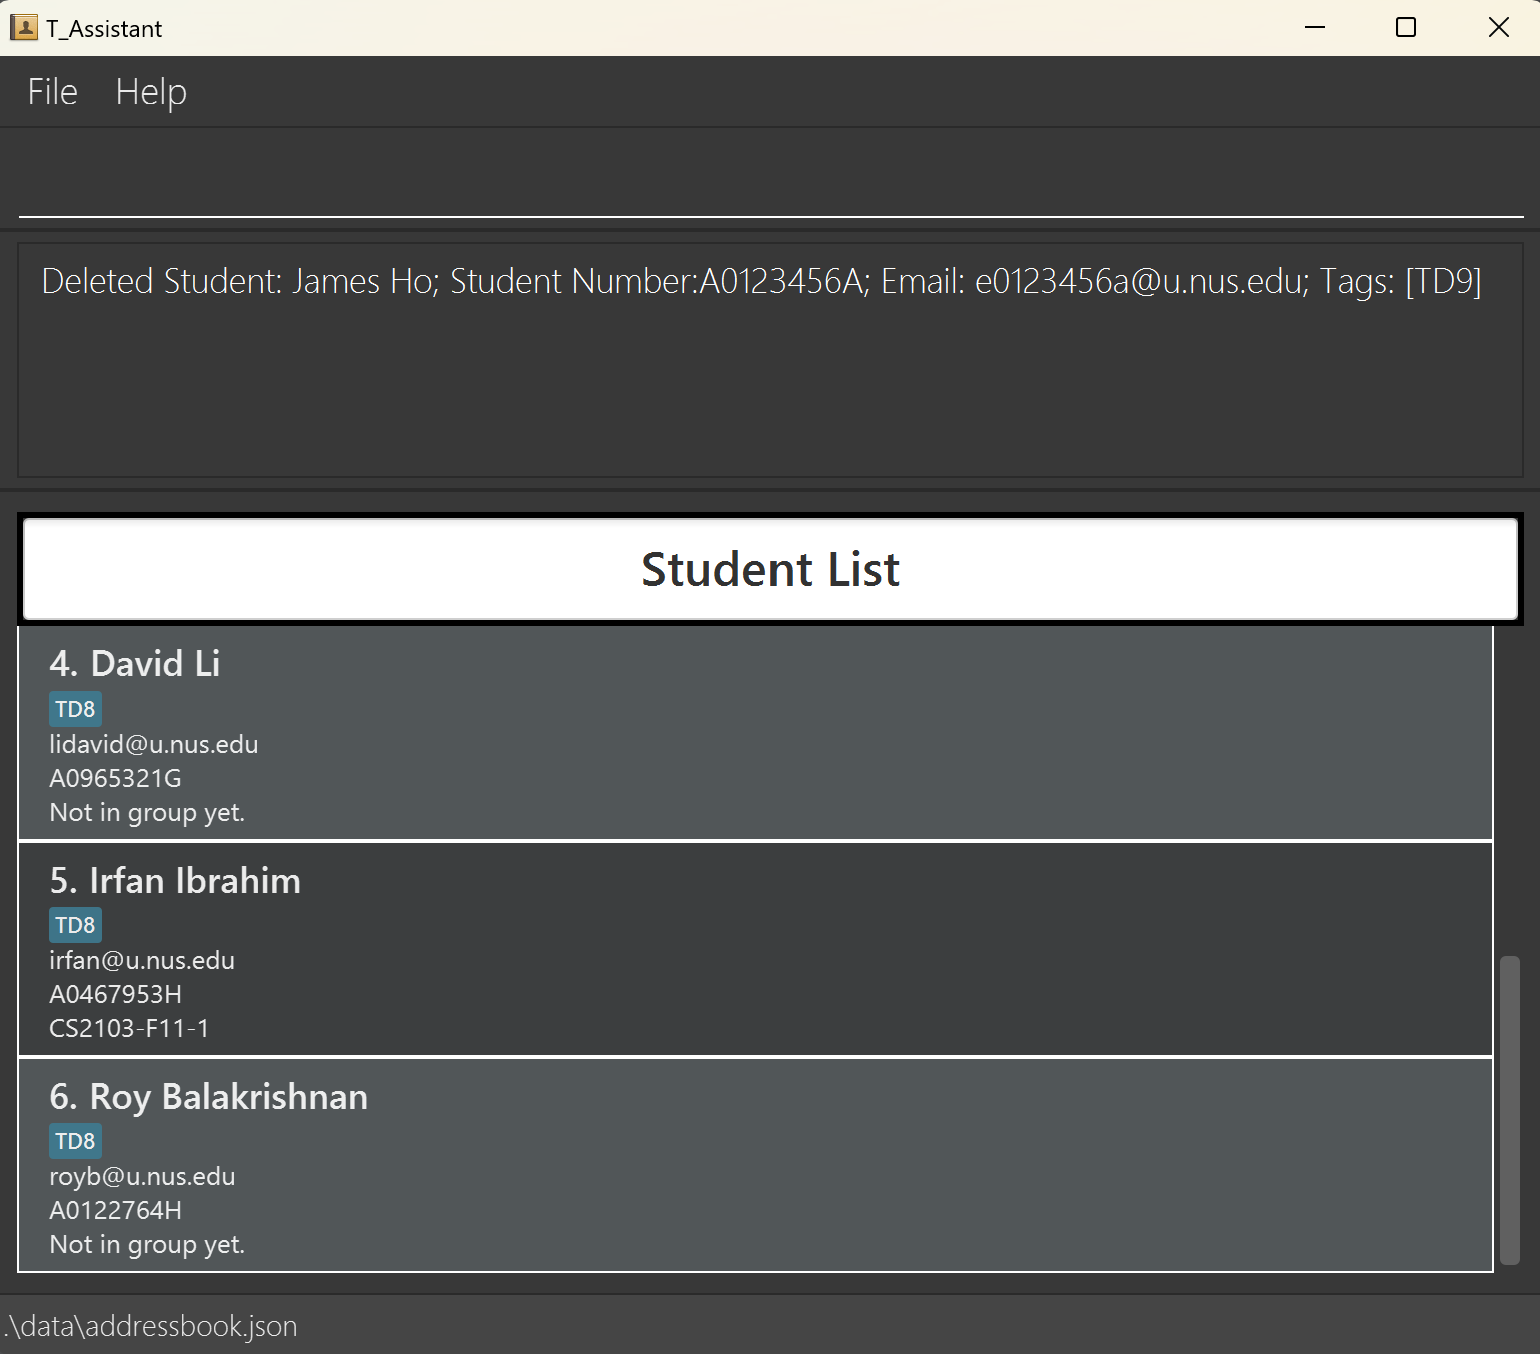
del_s sno/A0123456A
This screenshot shows the result of executing del_s sno/A0123456A.
Editing a Student: edit_s, es
Edits the details of a student.
Format: edit_s i/INDEX [sn/NAME] [e/EMAIL] [t/TAG]...
Notes
edit_sedits the student identified by the index. It only accepts a valid index based on the list returned whenlist_sis called.- Since
Student Numberis the unique identifier for each student,Student Numbercan't be edited. Emailcan be edited, but it must not exist in T_Assistant.- At least 1 optional parameter must be provided, else an error will be thrown.
- Editing of tags is not cumulative, i.e. tags will be replaced by the new set of tags.
- Tags are removed by entering
t/without specifying any tags after it. - For information on the constraints for each parameter used in this command, go to Command Parameters.
Usage Scenario
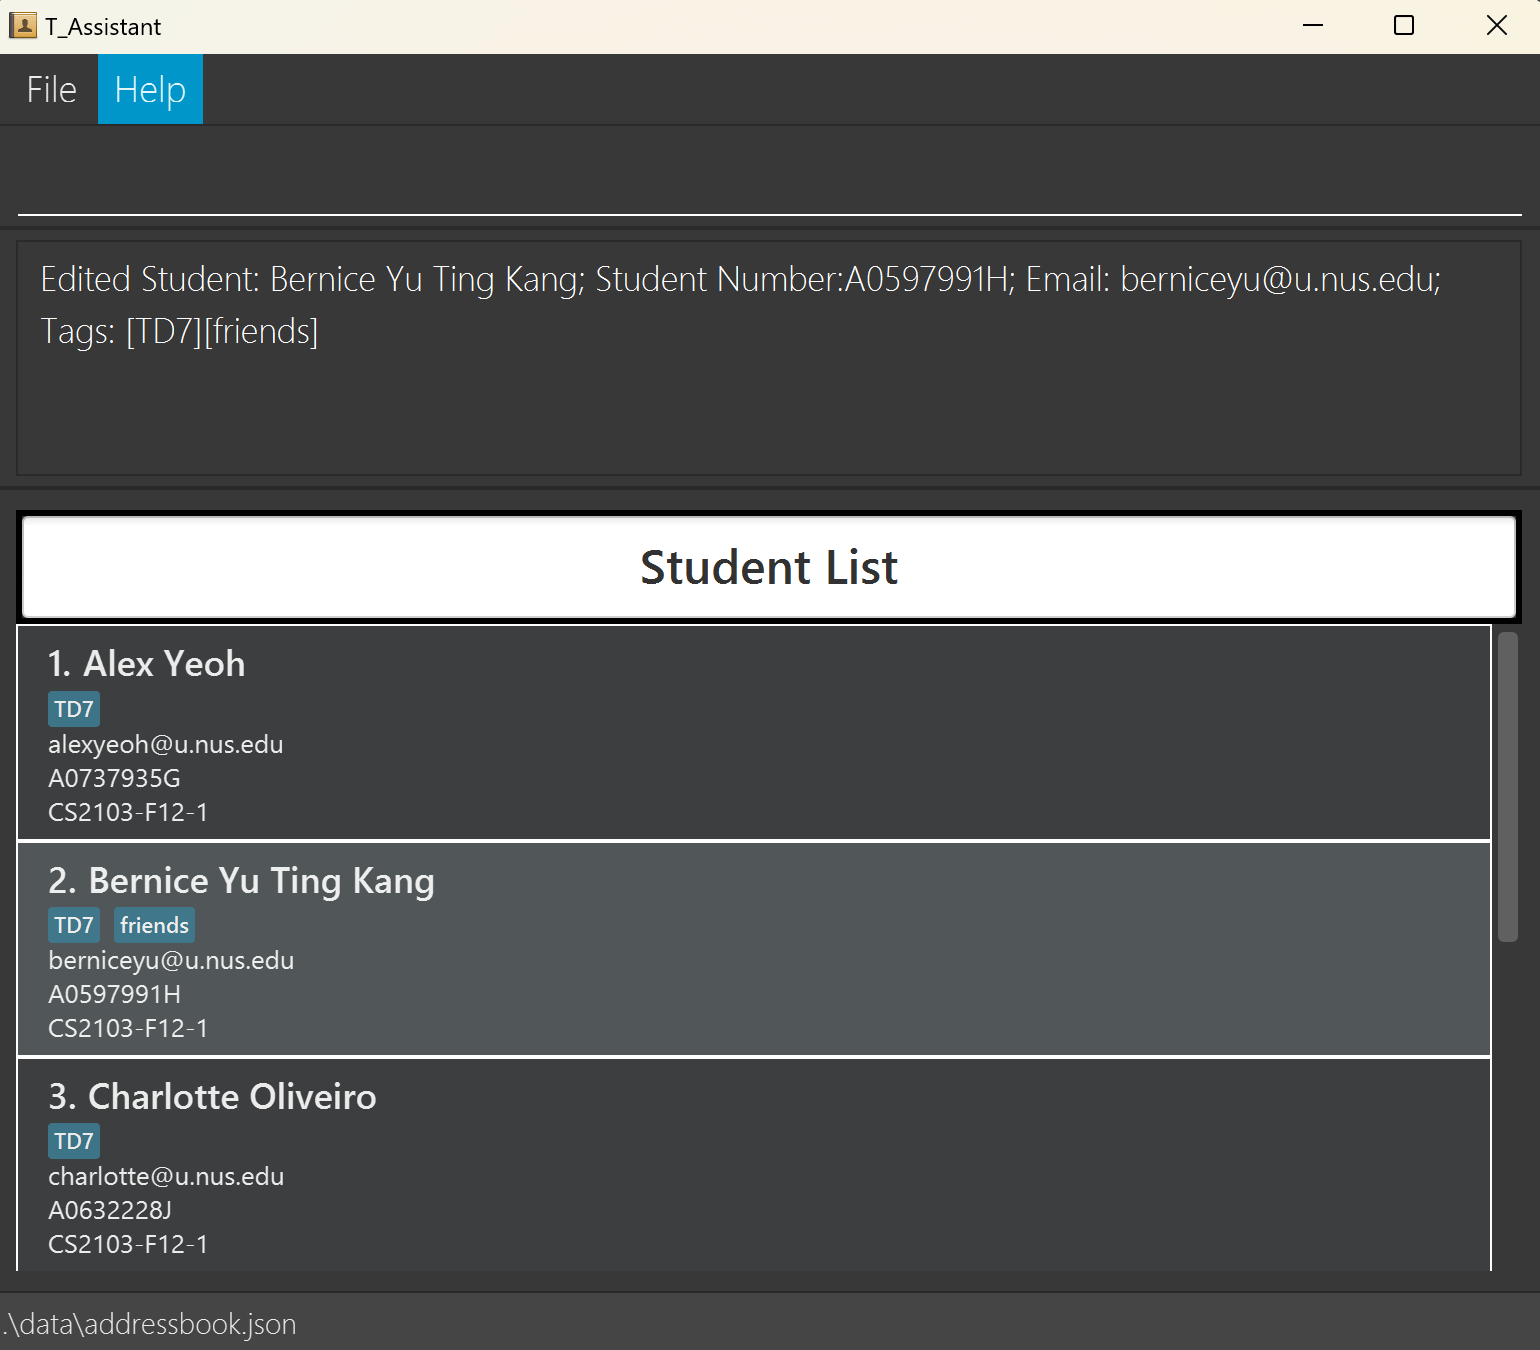
Scenario #1: Editing Bernice Yu's Name
- You can begin this command on any panel.
- Type and execute:
edit_s i/2 sn/Bernice Yu Ting Kang
This screenshot shows the result of executing edit_s i/2 sn/Bernice Yu Ting Kang.
Adding a Student to a Group: add_s_g, asg
Adds student(s) to a group.
Format: add_s_g sno/STUDENT_NUMBER [sno/STUDENT_NUMBER]... gn/GROUP_NAME
Notes
- The group with the
Group Nameand student(s) with theStudent Number(s) must both exist in T_Assistant. - The max size for a
Groupis 5Students. - Returns a filtered view of the group the student was added into.
- For information on the constraints for each parameter used in this command, go to Command Parameters.
Usage Scenario
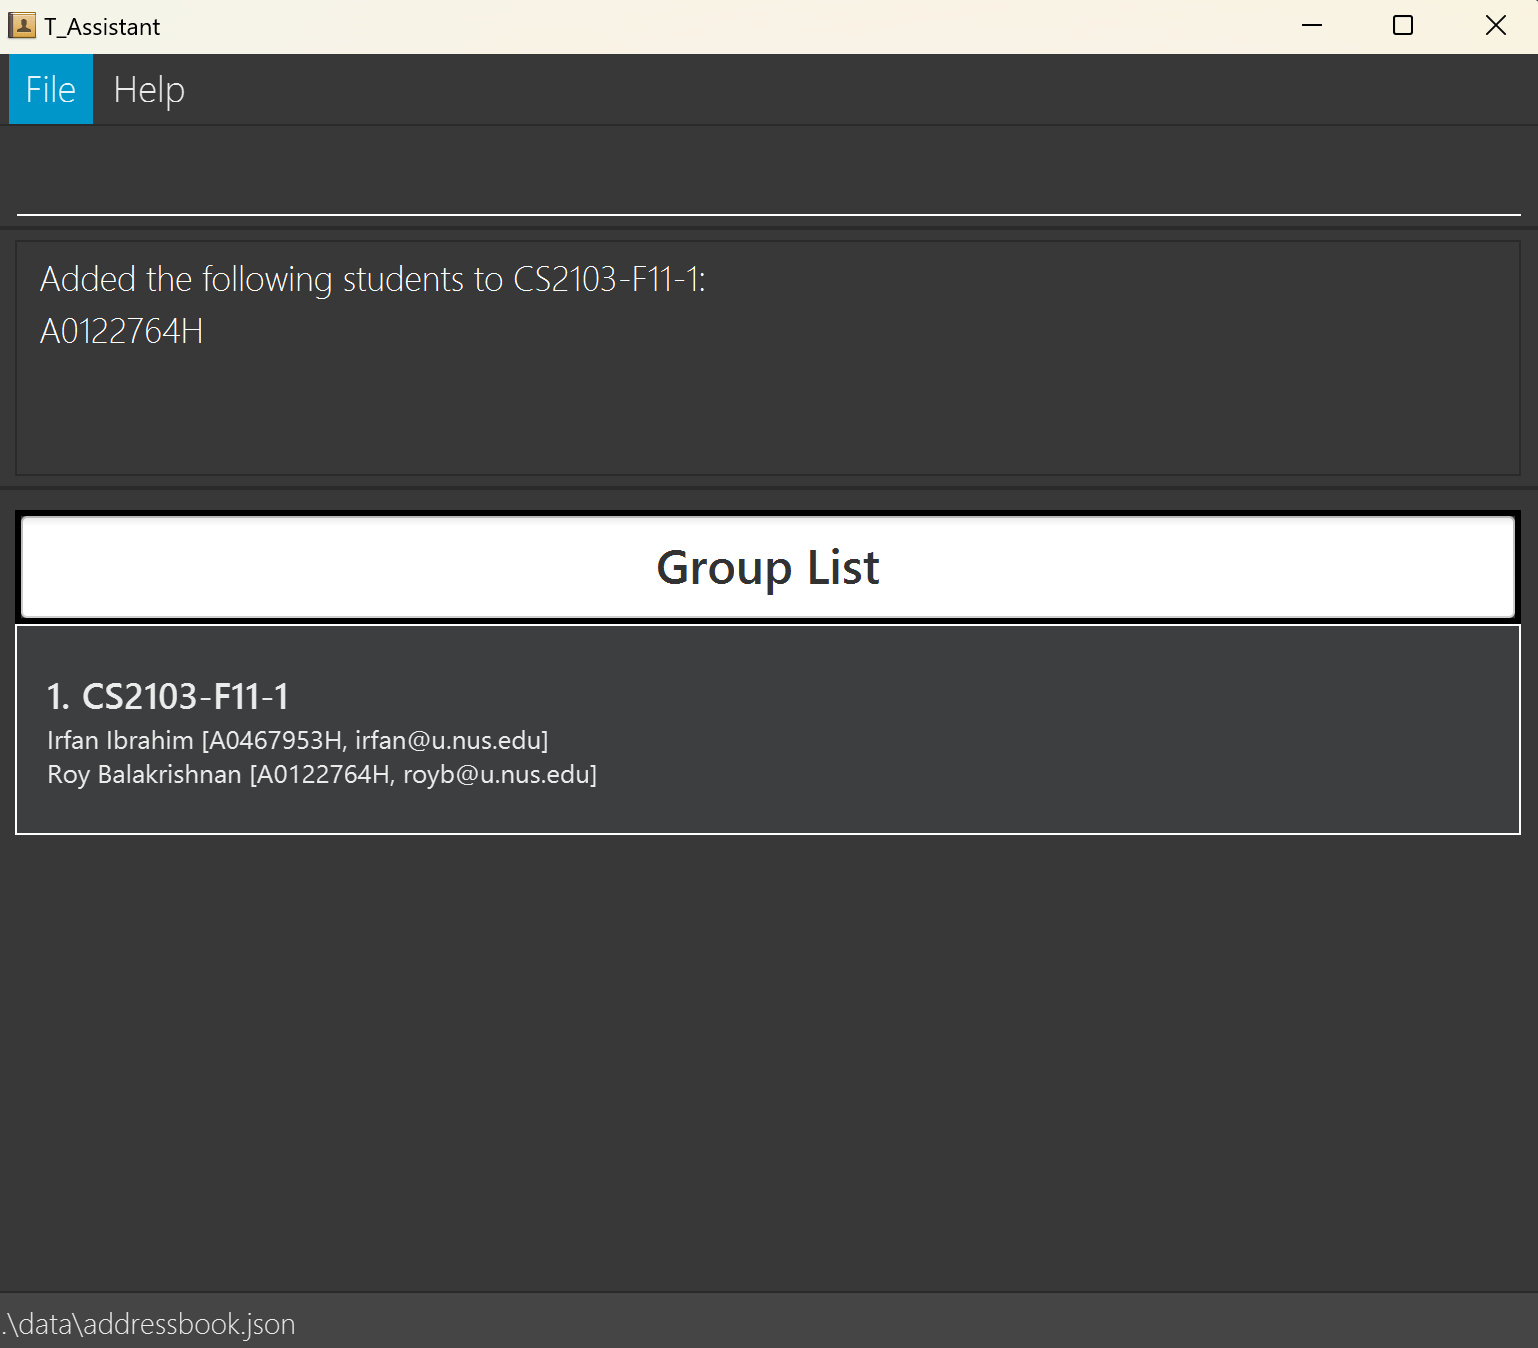
Scenario #1: Adding Roy Balakrishnan to CS2103-F11-1
- You can begin this command on any panel.
- Type and execute:
add_s_g sno/A0122764H gn/CS2103-F11-1
This screenshot shows the result of executing add_s_g sno/A0122764H gn/CS2103-F11-1.
Deleting a Student from a Group: del_s_g, dsg
Deletes a student from its assigned group.
Format: del_s_g sno/STUDENT_NUMBER
Notes
- This command only removes a student from a group, not from T_Assistant.
- The student must exist in T_Assistant and be in a group.
- Since a student can only be in one group, it will automatically remove the student from the group it is in.
- Returns a filtered view of the group the student was in.
- For information on the constraints for each parameter used in this command, go to Command Parameters.
Usage Scenario
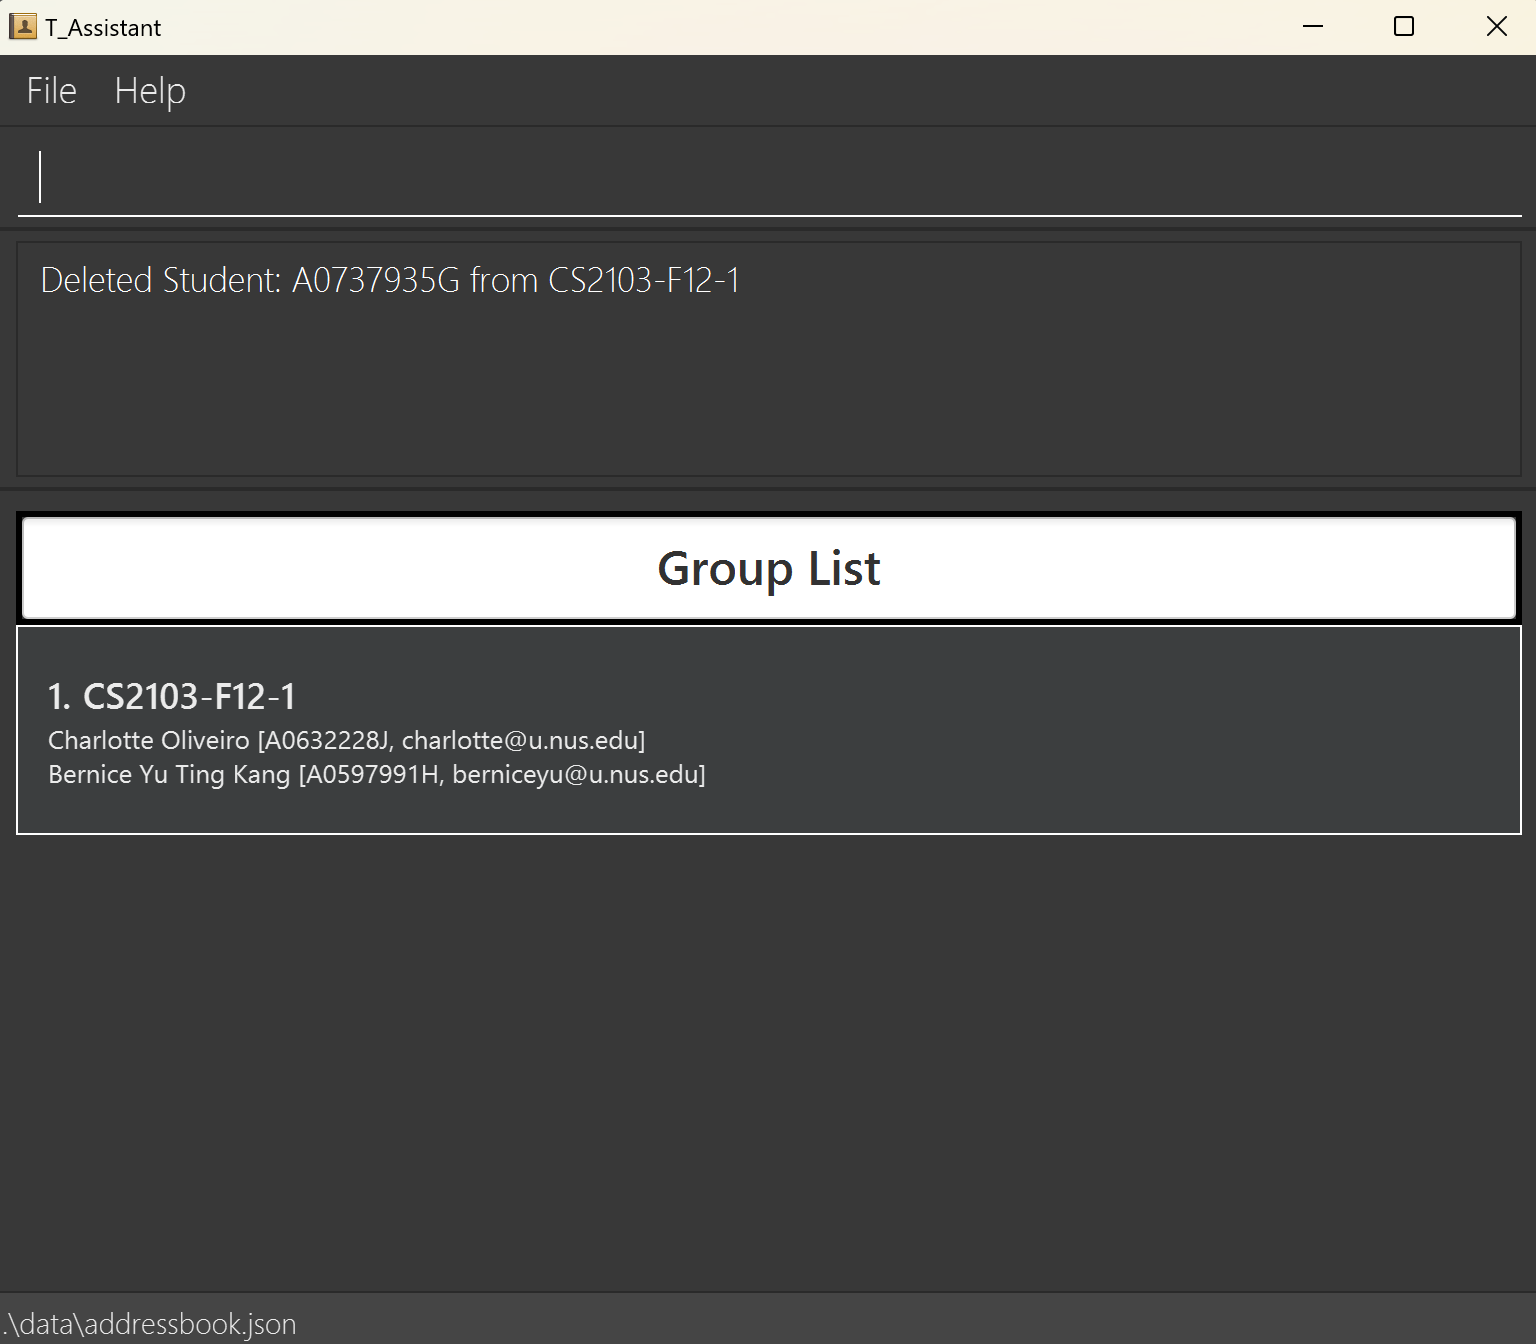
Scenario #1: Deleting Alex Yeoh from CS2103-F12-1
- You can begin this command on any panel.
- Type and execute:
del_s_g sno/A0737935G
This screenshot shows the result of executing del_s_g sno/A0737935G.
Finding Students: find_s, fs
Searches T_Assistant for students with fields that match the search query.
Format: find_s q/QUERY [q/QUERY]...
Notes
- This command is case-insensitive.
- The command will match substrings. You may search for part of a student's name such as
Alex Yto findAlex Yeoh. - A blank query i.e.
fs q/will return all students. - This command functions on an OR logic. It will return all students that have fields that match any of the queries.
- Searches the following fields that a student has that matches the query:
- Student name
- Student number
- Group name
!nogroupis a special query that searches for students with no groups, it is also case-insensitive.
Take note that if any other student with a group happens to have a field that matches the special keyword, they will also appear in the results.
- For information on the constraints for each parameter used in this command, go to Command Parameters.
Usage Scenario
Scenario #1: Find students with the following queries - TD7 and Oliveiro
- You can begin this command on any panel.
- Type and execute:
find_s q/TD7 q/Olveiro
This screenshot shows the result of executing find_s q/TD7 q/Olveiro.
Scenario #2: Find students with no groups
- You can begin this command on any panel.
- Type and execute:
find_s q/!nogroup
This screenshot shows the result of executing find_s q/!nogroup.
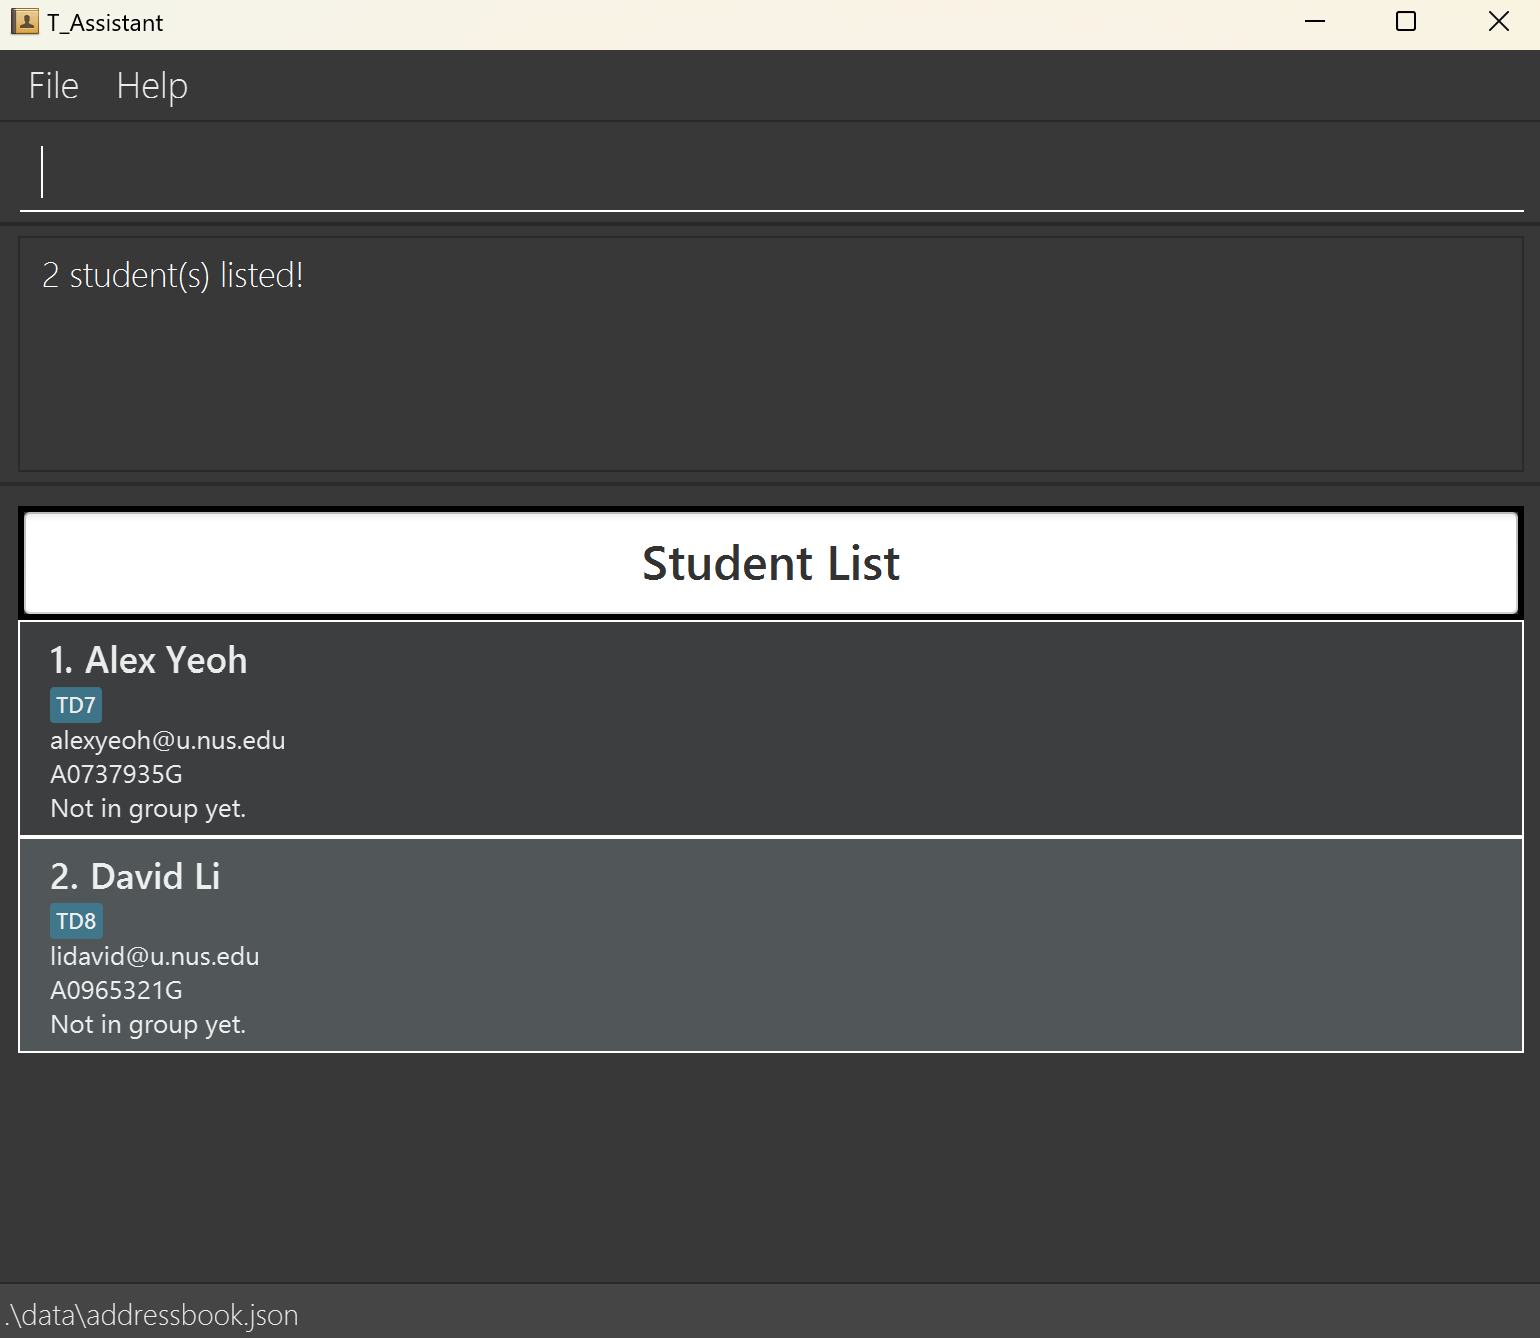
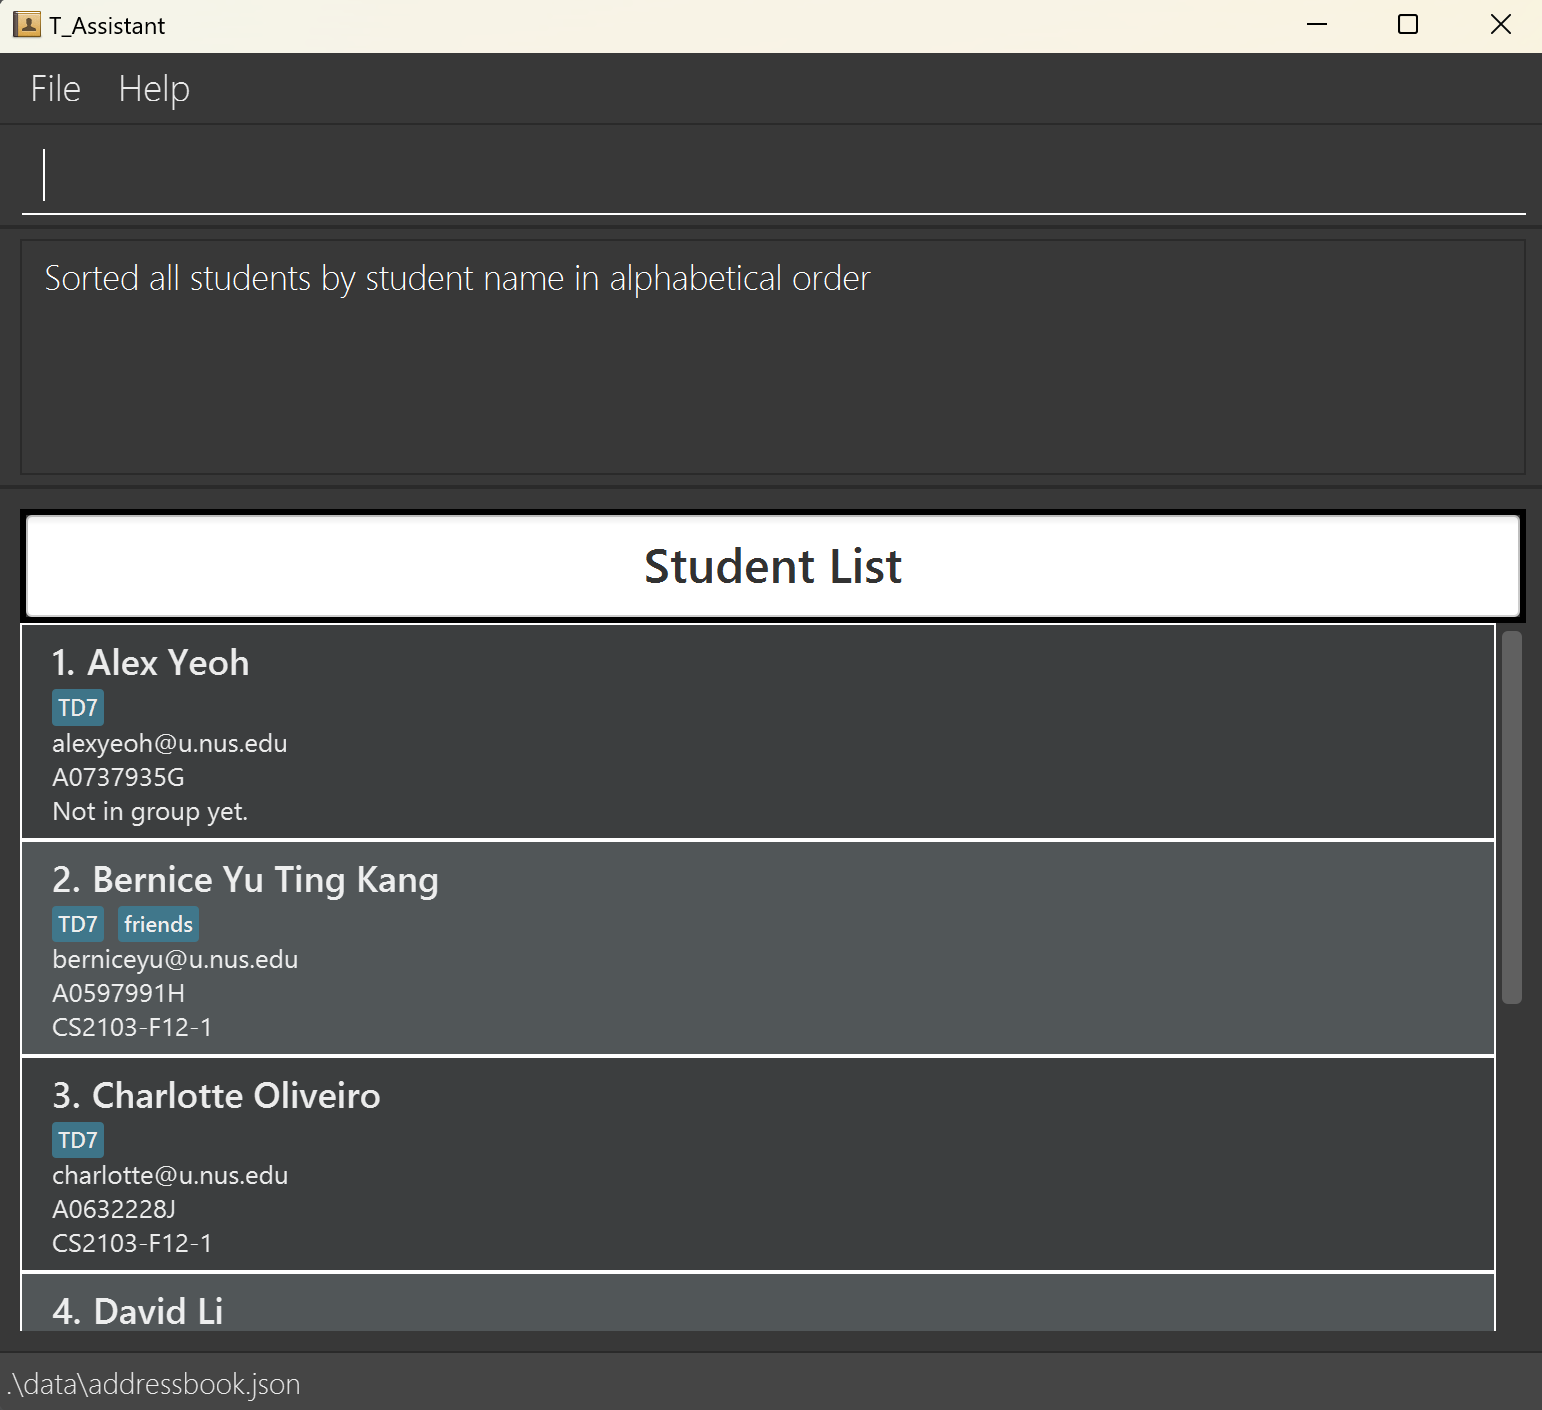
Sorting Students: sort_s, ss
Sorts the list of students in ASCII order.
Format: sort_s
Caution:
The student list is sorted in ASCII order, not in alphabetical order as the message will say after successfully executing sort_s.
This screenshot shows the result of executing sort_s.
Group Commands
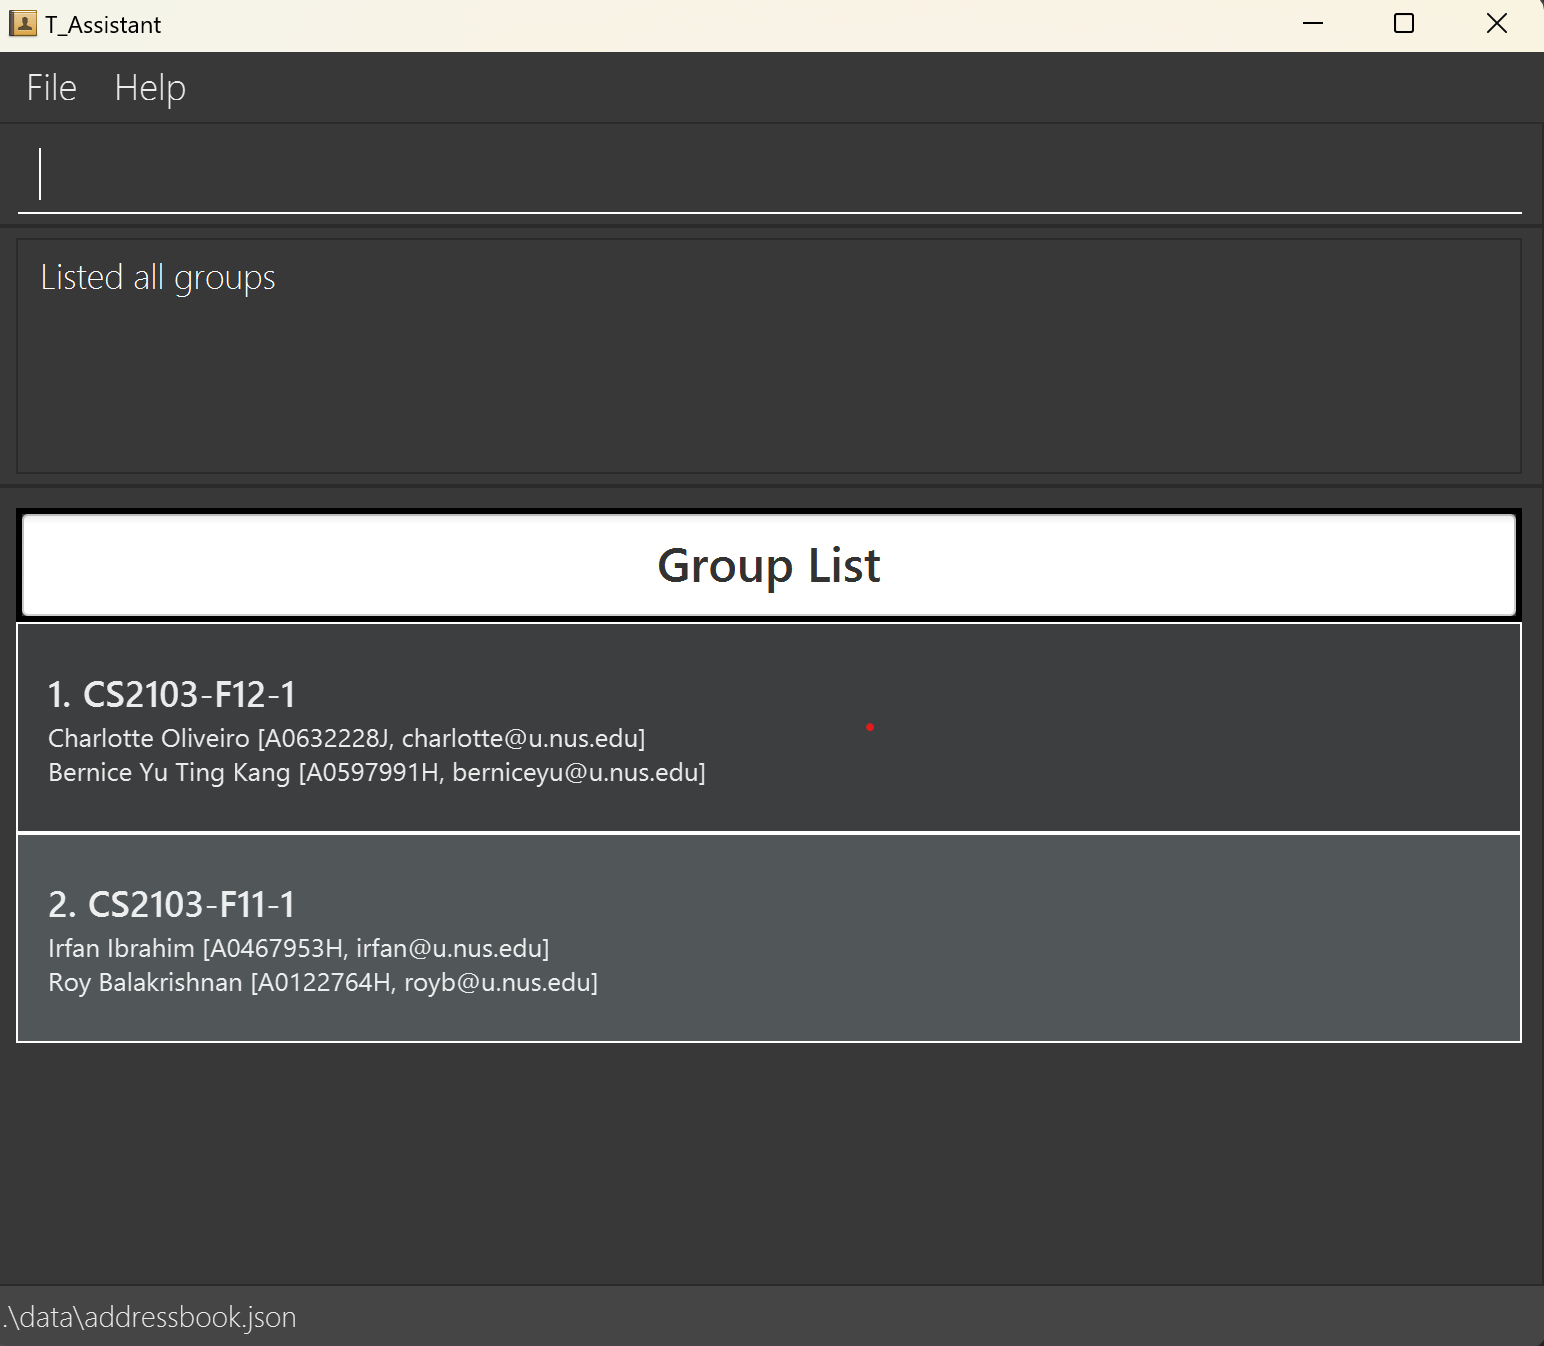
Listing Groups: list_g, lg
Shows a list of all groups in the T_Assistant.
Format: list_g
This screenshot shows the result of executing list_g.
Adding a Group: add_g, ag
Adds a group to the T_Assistant。
Format: add_g/ag gn/GROUP_NAME [gn/GROUP_NAME]...
Notes
Group Nameis the unique identifier for each group, so no two groups can have the same group name.- Leading 0s in
Group Namewill be truncated, e.g.CS2103-F00012-002will be read asCS2103-F12-2. - For information on the constraints for each parameter used in this command, go to Command Parameters.
Usage Scenario
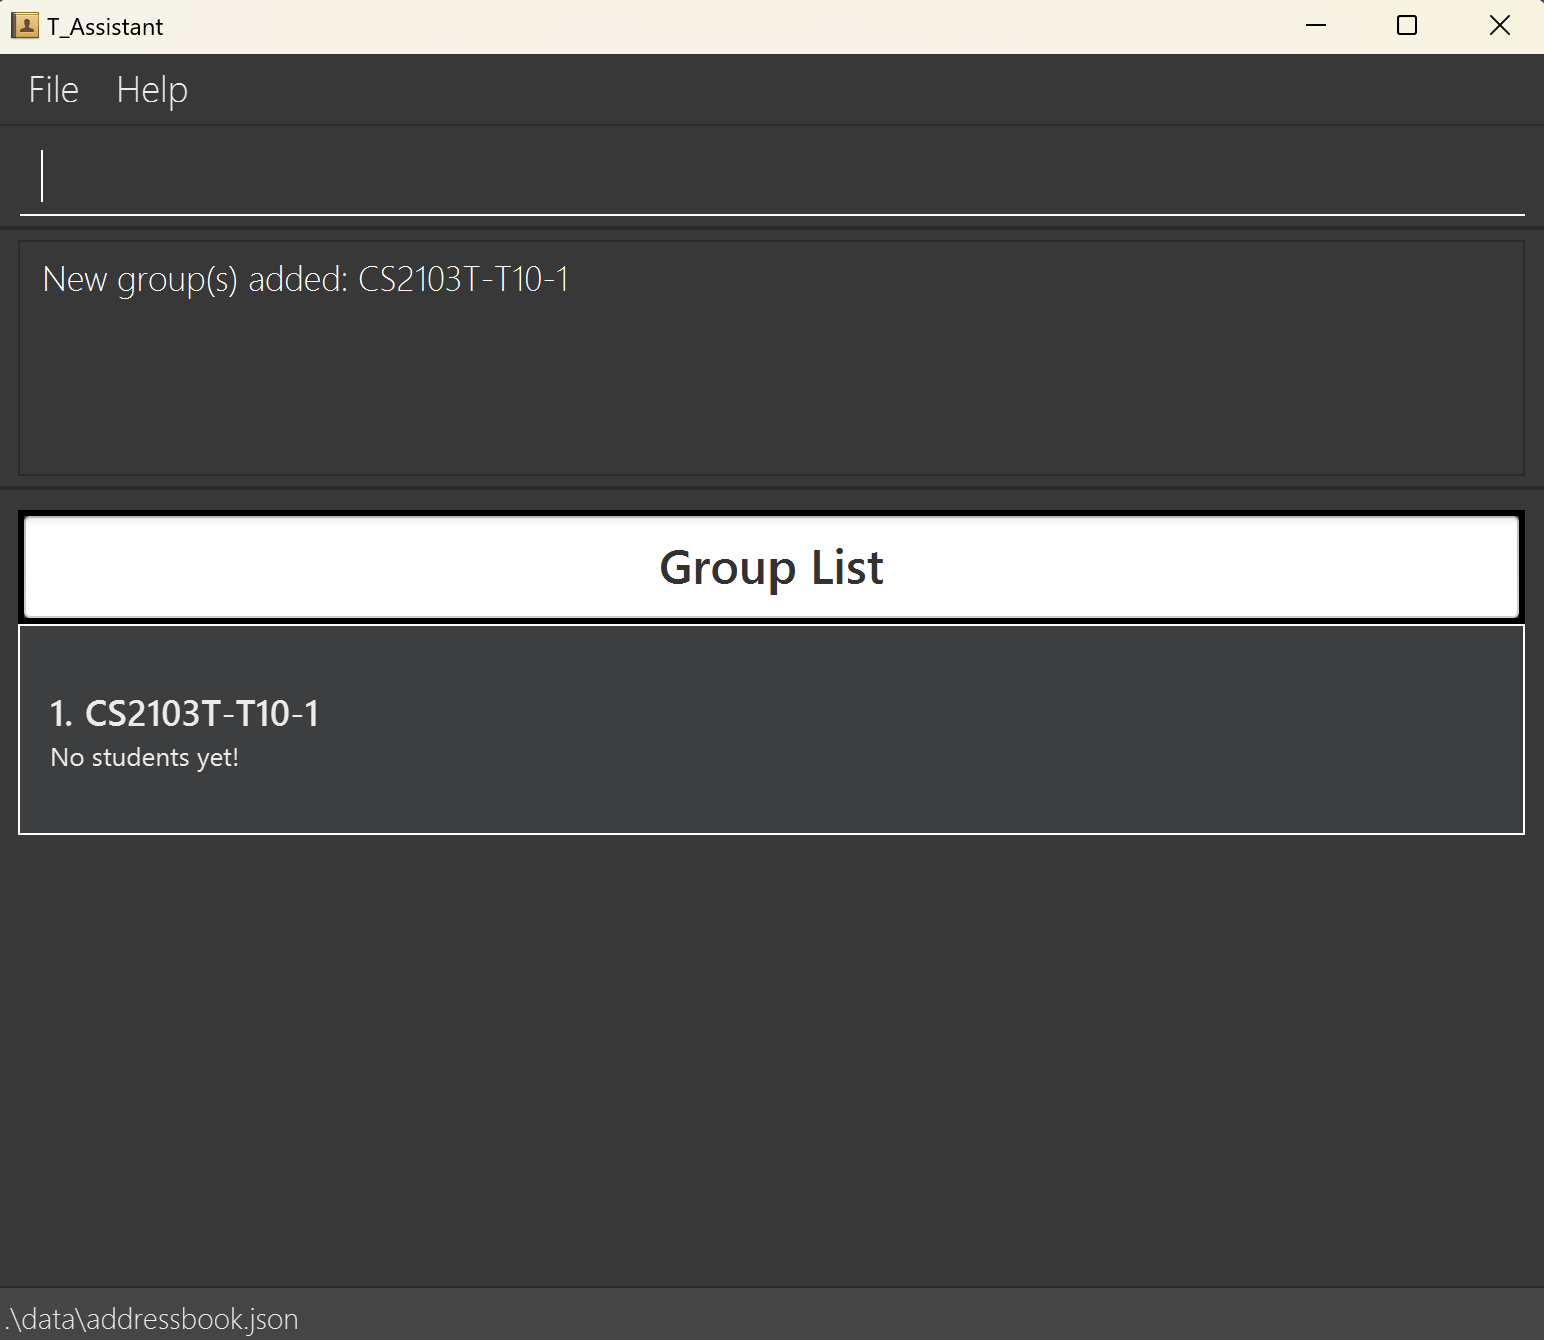
Scenario #1: Adding group CS2103T-T10-1
- You can begin this command on any panel.
- Type and execute:
add_g gn/CS2103T-T10-1
This screenshot shows the result of executing add_g gn/CS2103T-T10-1.
Deleting a Group: del_g, dg
Deletes the specified group from T_Assistant.
Format: del_g gn/GROUP_NAME
Notes
- This command is case-insensitive.
del_g gn/CS2103-F12-2anddel_g gn/cs2103-f12-2will delete the same group. - This command will also remove students from the deleted group.
- For information on the constraints for each parameter used in this command, go to Command Parameters.
Usage Scenario
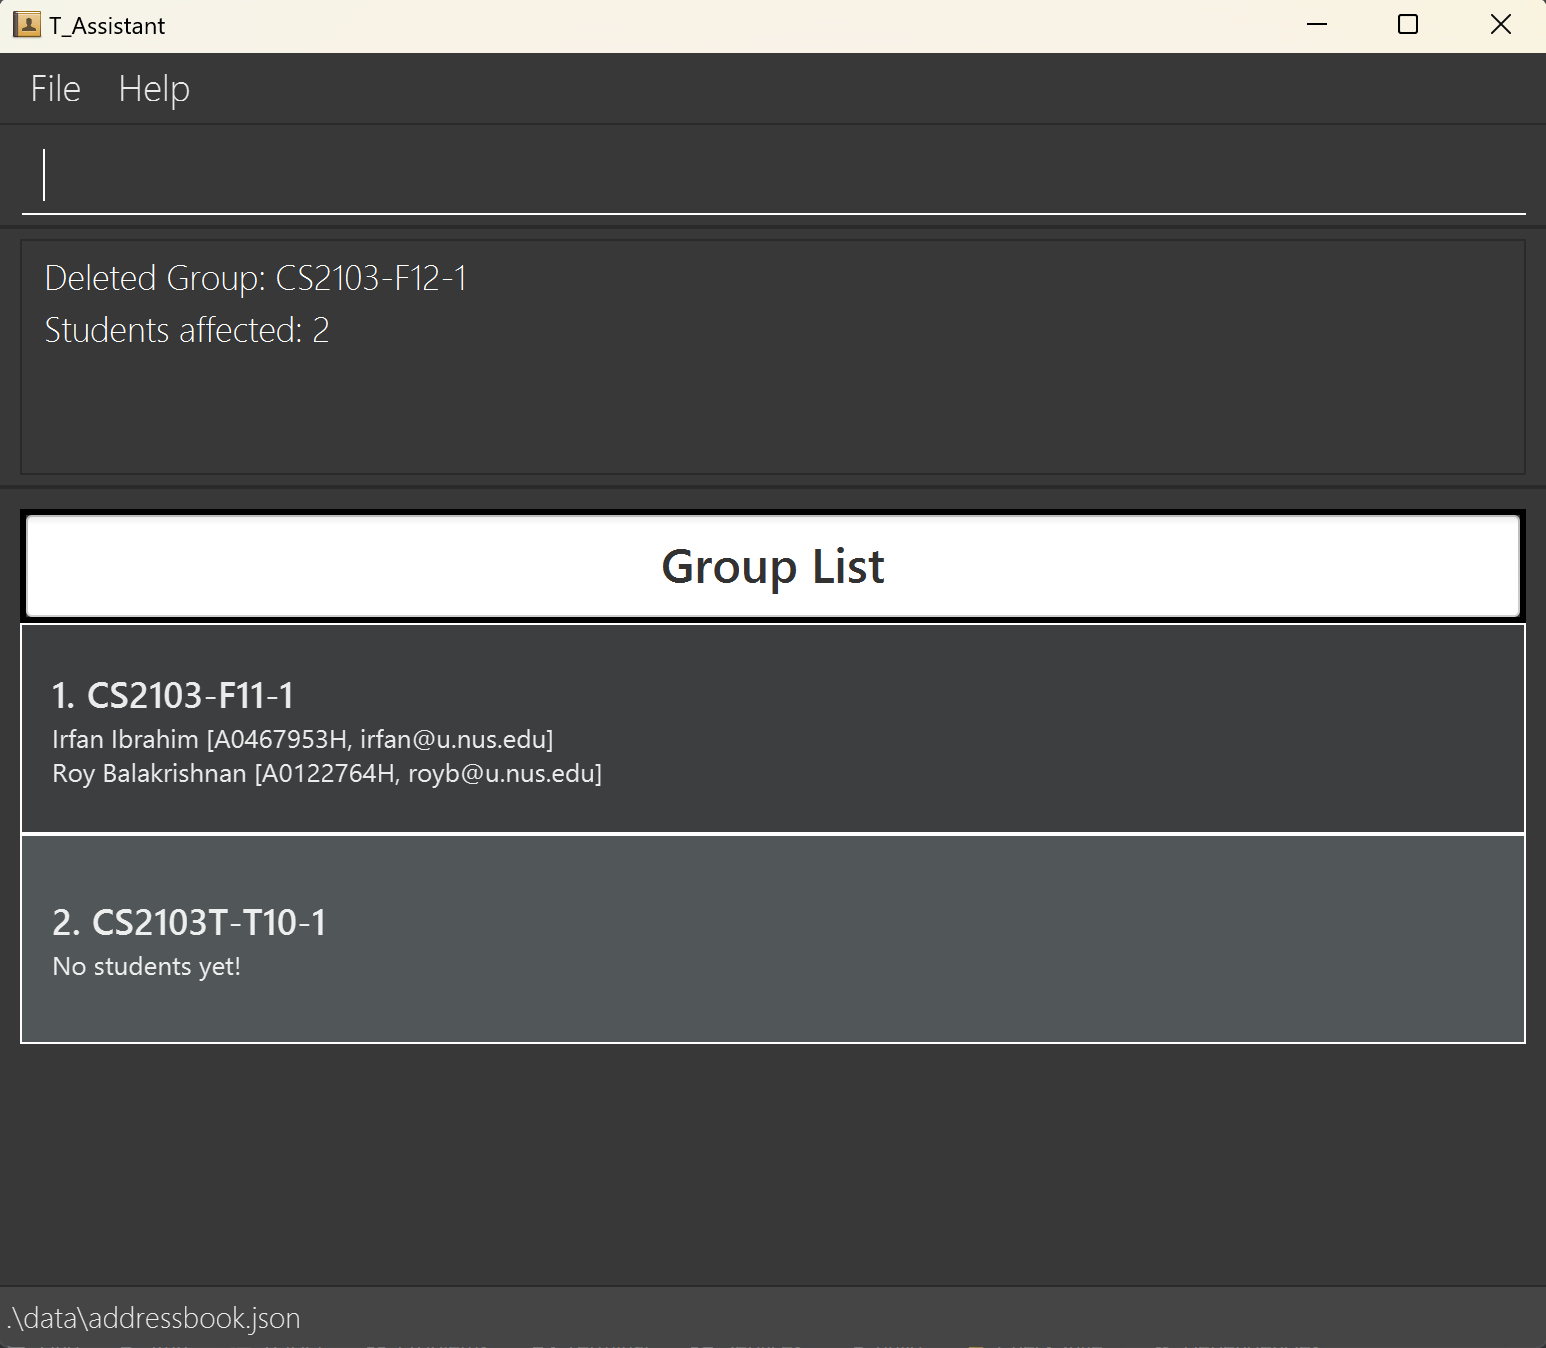
Scenario #1: Deleting group CS2103-F12-2
- You can begin this command on any panel.
- Type and execute:
del_g gn/CS2103-F12-2
This screenshot shows the result of executing del_g gn/CS2103-F12-2.
Editing a Group: edit_g, eg
Edits the specified group in T_Assistant.
Format: edit_g i/INDEX gn/GROUP_NAME
Notes
edit_gedits the group identified by the index. It only accepts a valid index based on the list returned whenlist_gis called.- For information on the constraints for each parameter used in this command, go to Command Parameters.
Usage Scenario
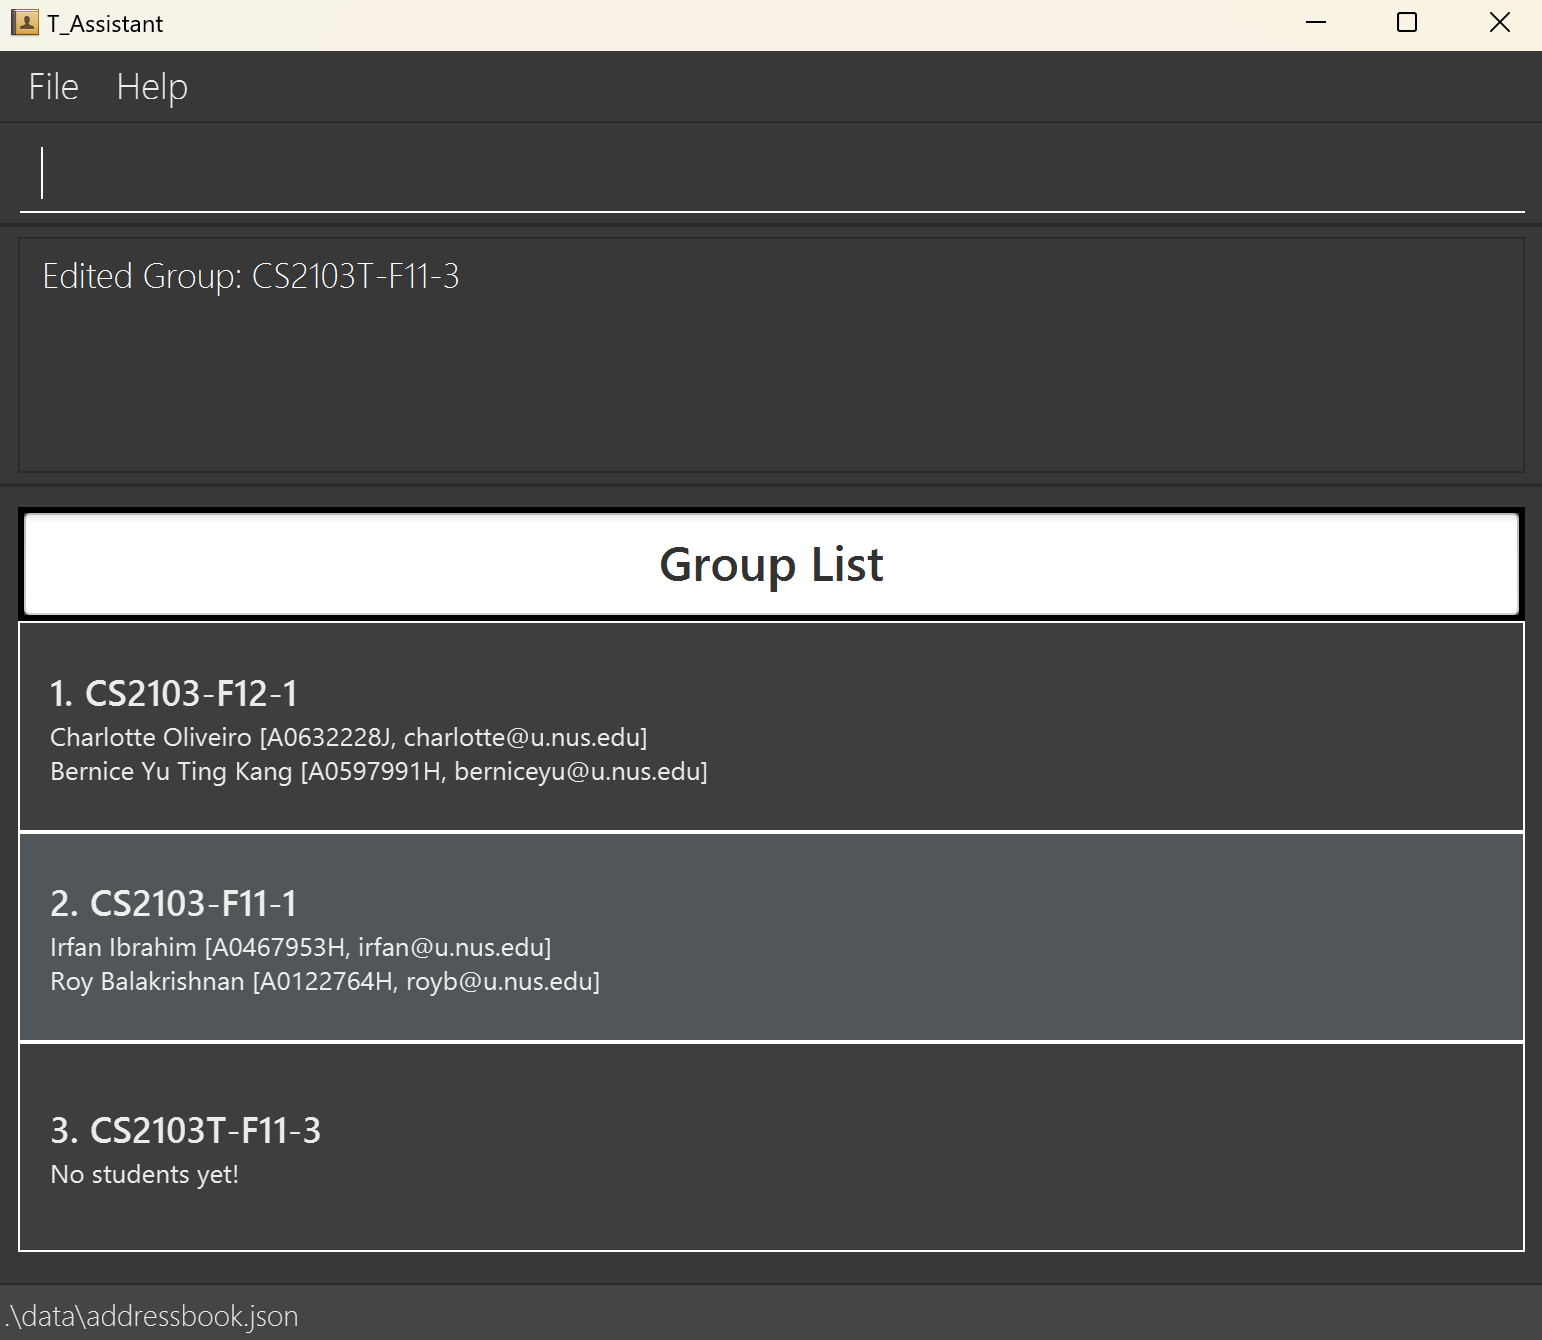
Scenario #1: Editing CS2103-F11-3 to CS2103T-F11-3
- Execute
list_gto see the list of groups. - Type and execute:
edit_g i/3 gn/CS2103T-F11-3
This screenshot shows the result of executing edit_g i/3 gn/CS2103T-F11-3.
Finding Groups: find_g, fg
Searches T_Assistant for groups with fields that match the search query.
Format: find_g q/QUERY [q/QUERY]...
Notes
- This command is case-insensitive.
- The command will match substrings. You may search for part of a group's name such as
F12to findCS2103T-F12-10. - A blank query i.e.
fg q/will return all groups. - This command functions on an OR logic. It will return all groups that have fields that match any of the queries.
- Searches the following field that a group has that matches the query:
- Group name
- For information on the constraints for each parameter used in this command, go to Command Parameters.
Usage Scenario
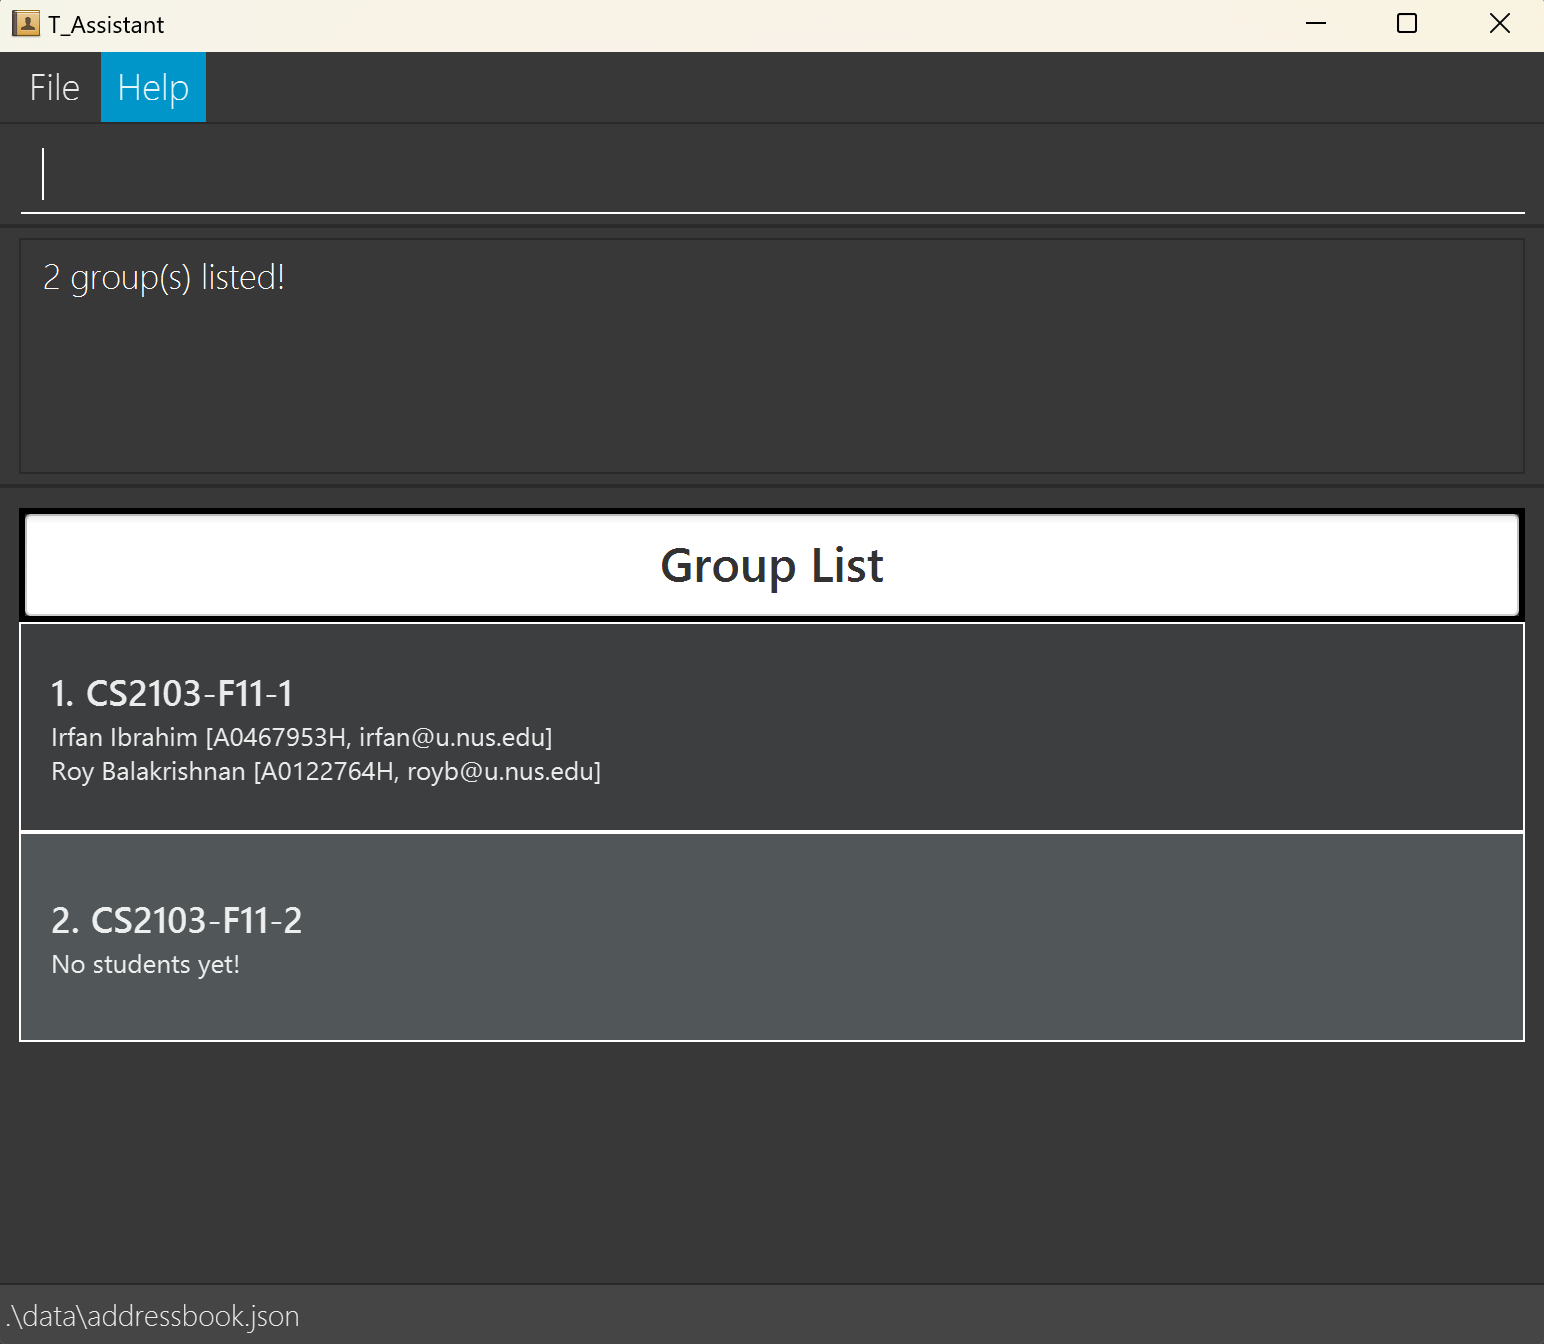
Scenario #1: Finding groups with the following query - F11
- You can begin this command on any panel.
- Type and execute:
find_g q/F11
This screenshot shows the result of executing find_g q/F11.
Sorting Groups: sort_g, sg
Sorts the list of groups in ASCII order.
Format: sort_g
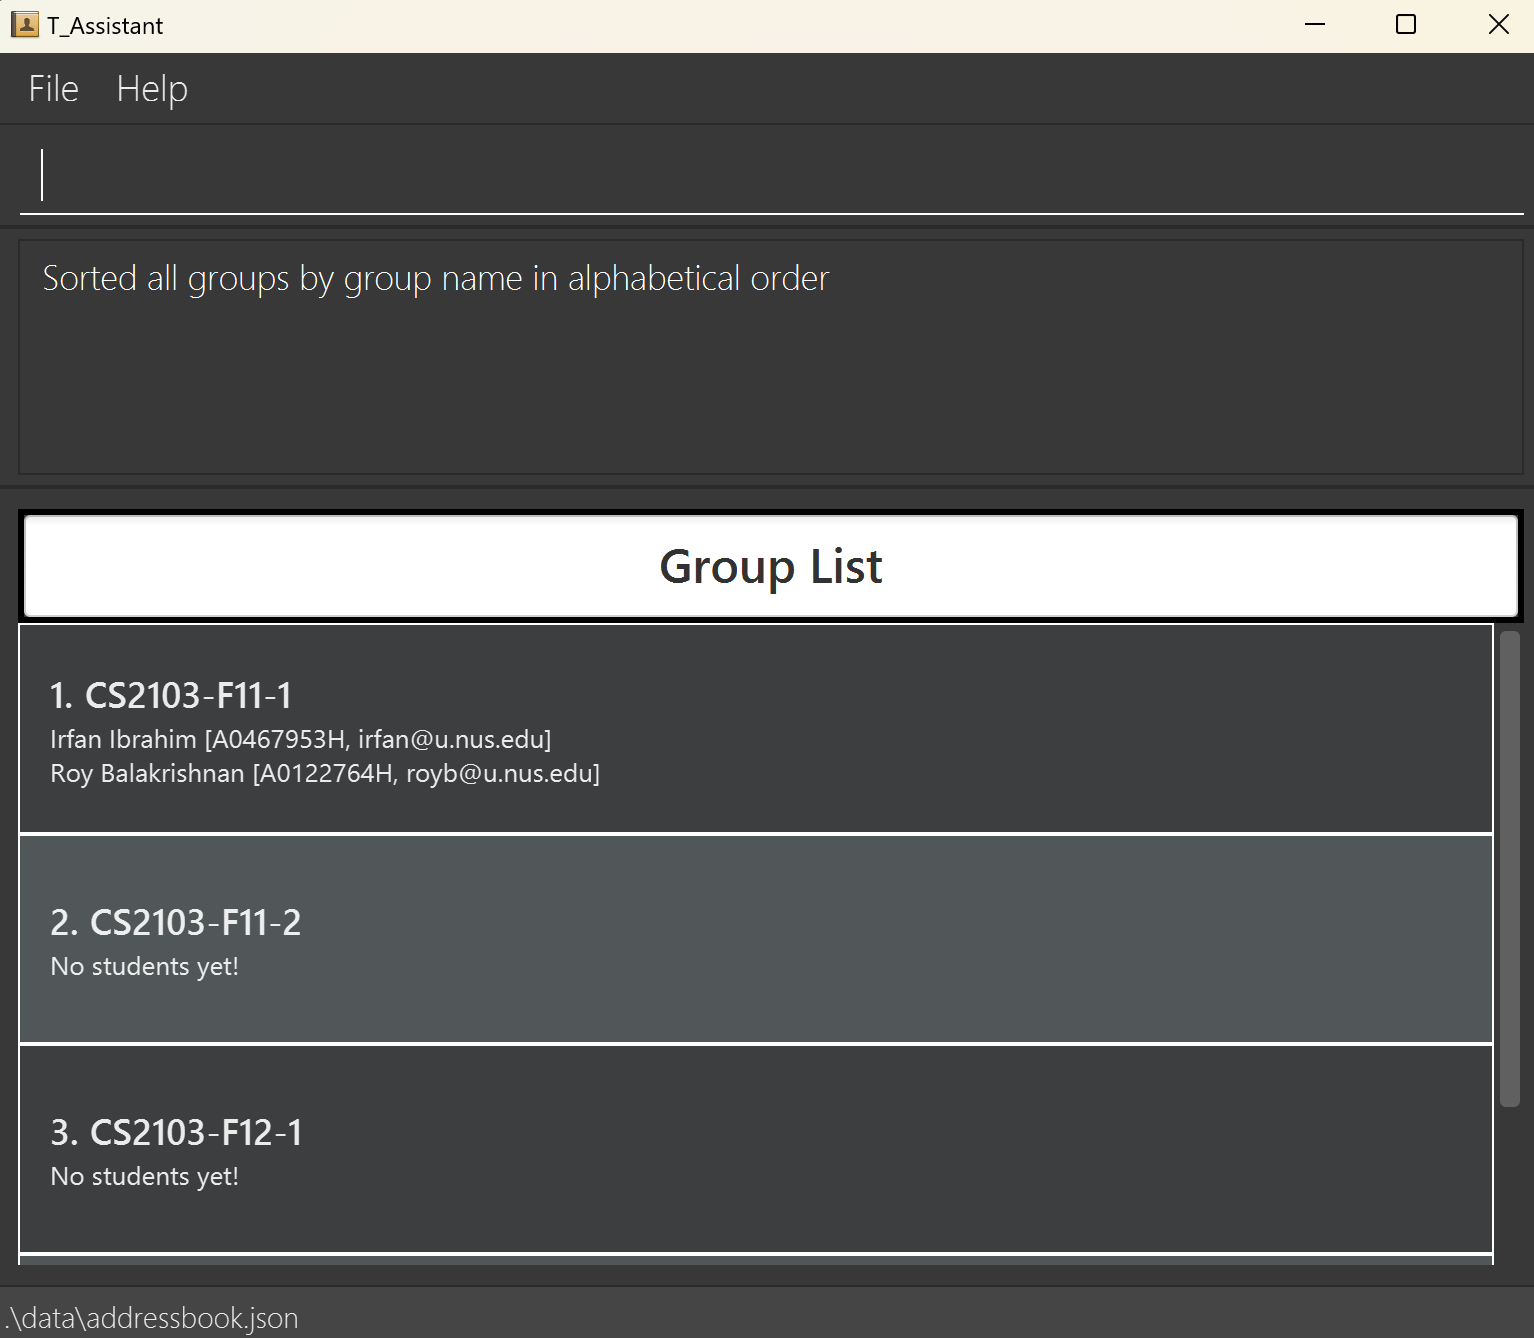
Caution:
The group list is sorted in ASCII order, not in alphabetical order as the message will say after successfully executing sort_g.
This screenshot shows the result of executing sort_g.
Task Commands
Listing Tasks: list_t, lt
Shows a list of all tasks in the T_Assistant.
Format: list_t [gn/GROUP_NAME]
Notes
- If there's a
gn/Group Namesupplied, all the tasks in that group will be listed instead. - For information on the constraints for each parameter used in this command, go to Command Parameters.
Usage Scenario
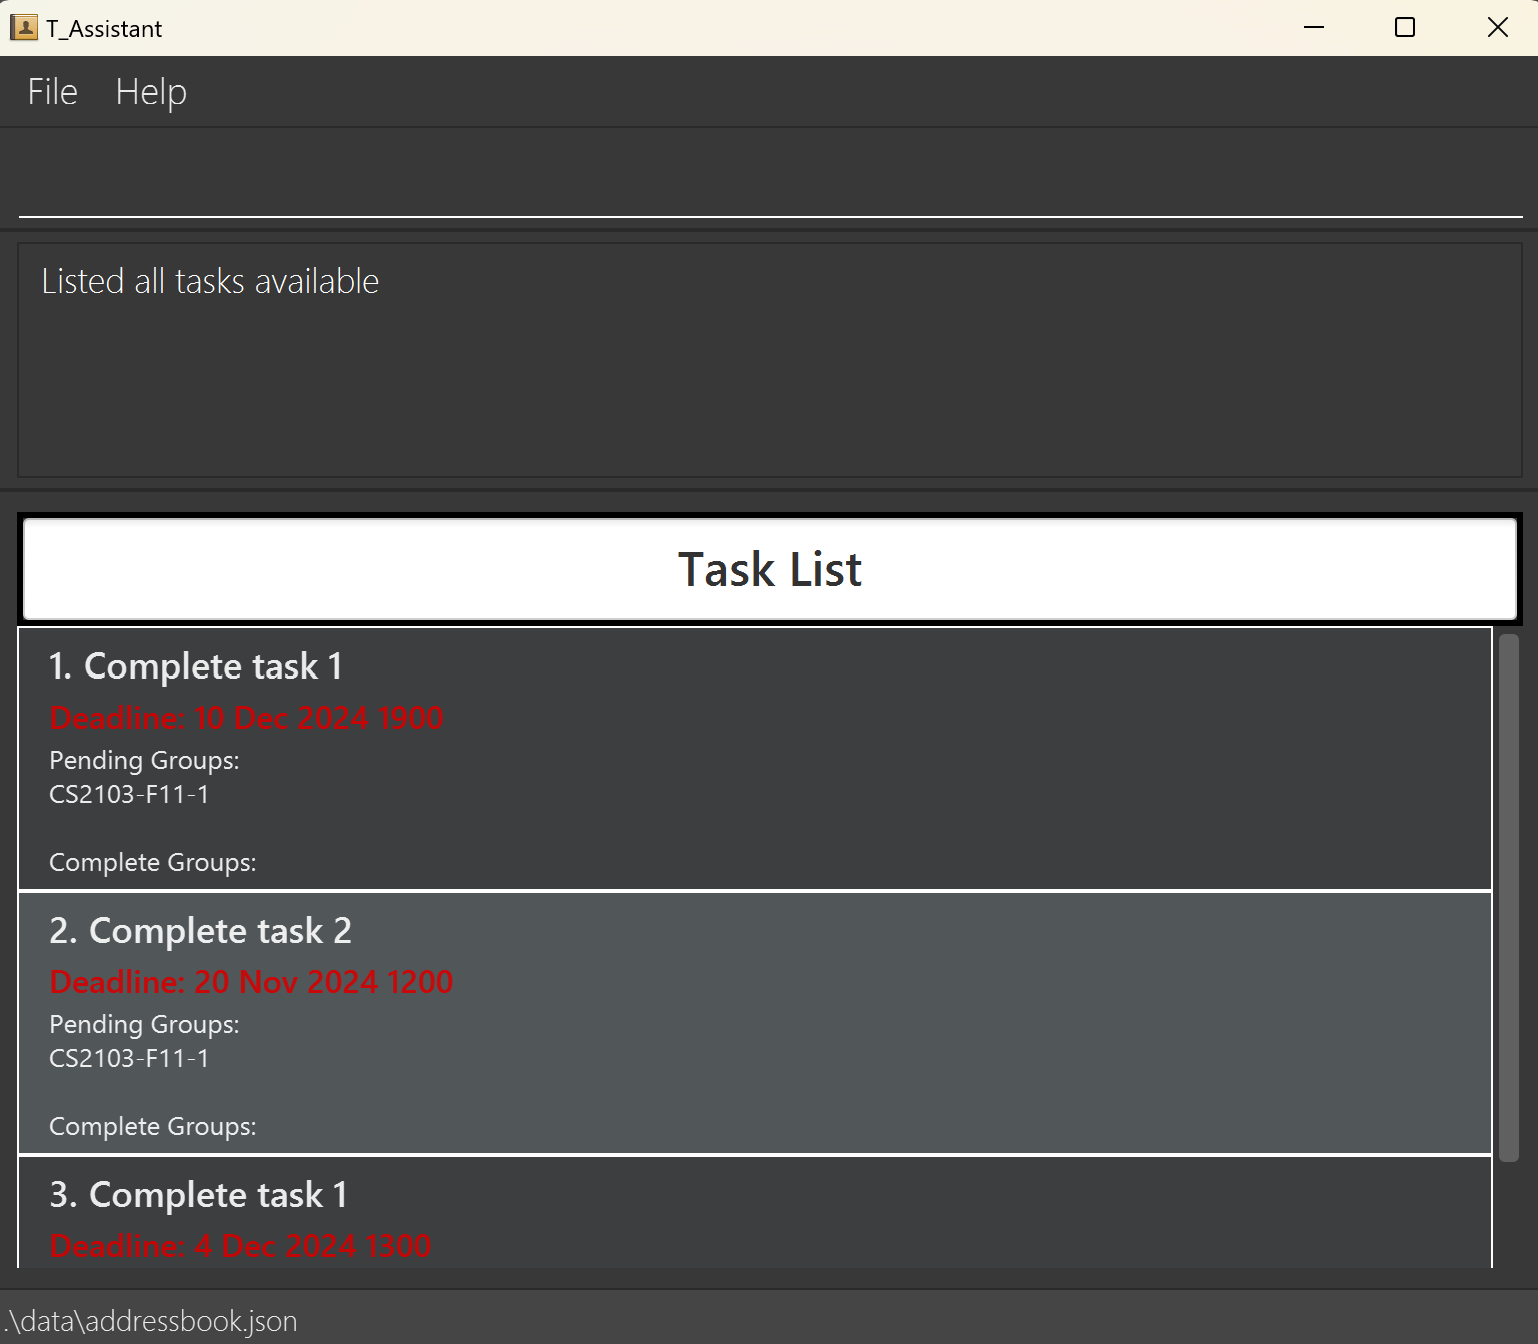
Scenario #1: Listing all tasks in all groups
- You can begin this command on any panel.
- Type and execute:
list_t
This screenshot shows the result of executing list_t.
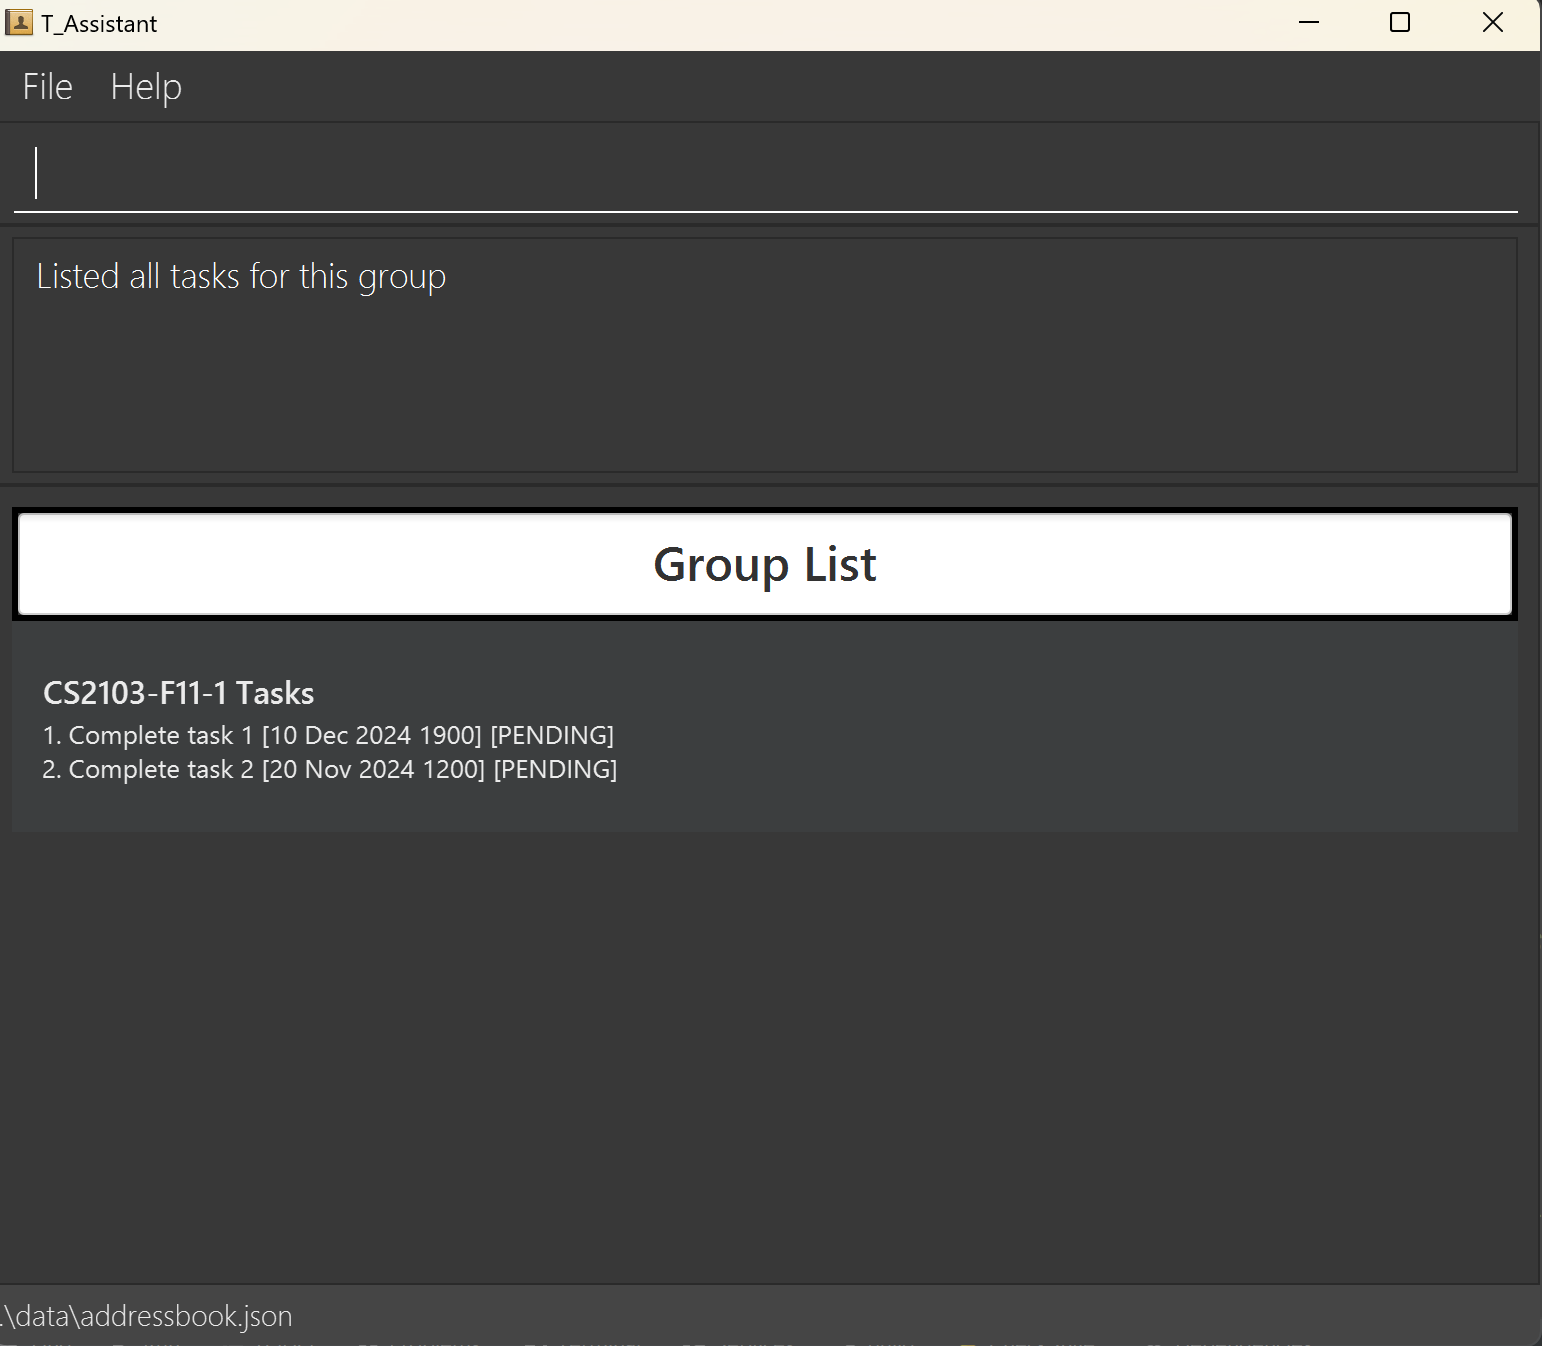
Scenario #2: Listing all tasks in CS2103-F11-1
- You can begin this command on any panel.
- Type and execute:
list_t gn/CS2103-F11-1
This screenshot shows the result of executing list_t gn/CS2103-F11-1.
Adding a Task to a Group: add_t_g, atg
Adds a task to a group or multiple groups.
Format: add_t_g tn/TASK_NAME td/TASK_DEADLINE (YYYY-MM-DD HHmm) gn/GROUP_NAME [gn/GROUP_NAME]...
Notes
- This command allows only the addition of a single task to one or multiple groups at the same time.
- The group name inputs are case-insensitive.
cs2103-f11-1will yield the same result asCS2103-F11-1. - This command is relatively flexible in terms of the input parameters. You can input duplicate group names. The application simply ignores the duplicates and adds the task to the desired group.
- This command checks for the existence of the task, hence you cannot input a task which already exists. A task is equal to another task when it has the same task name and deadline as it.
- Returns a filtered view of the task added.
- For information on the constraints for each parameter used in this command, go to Command Parameters.
Usage Scenario
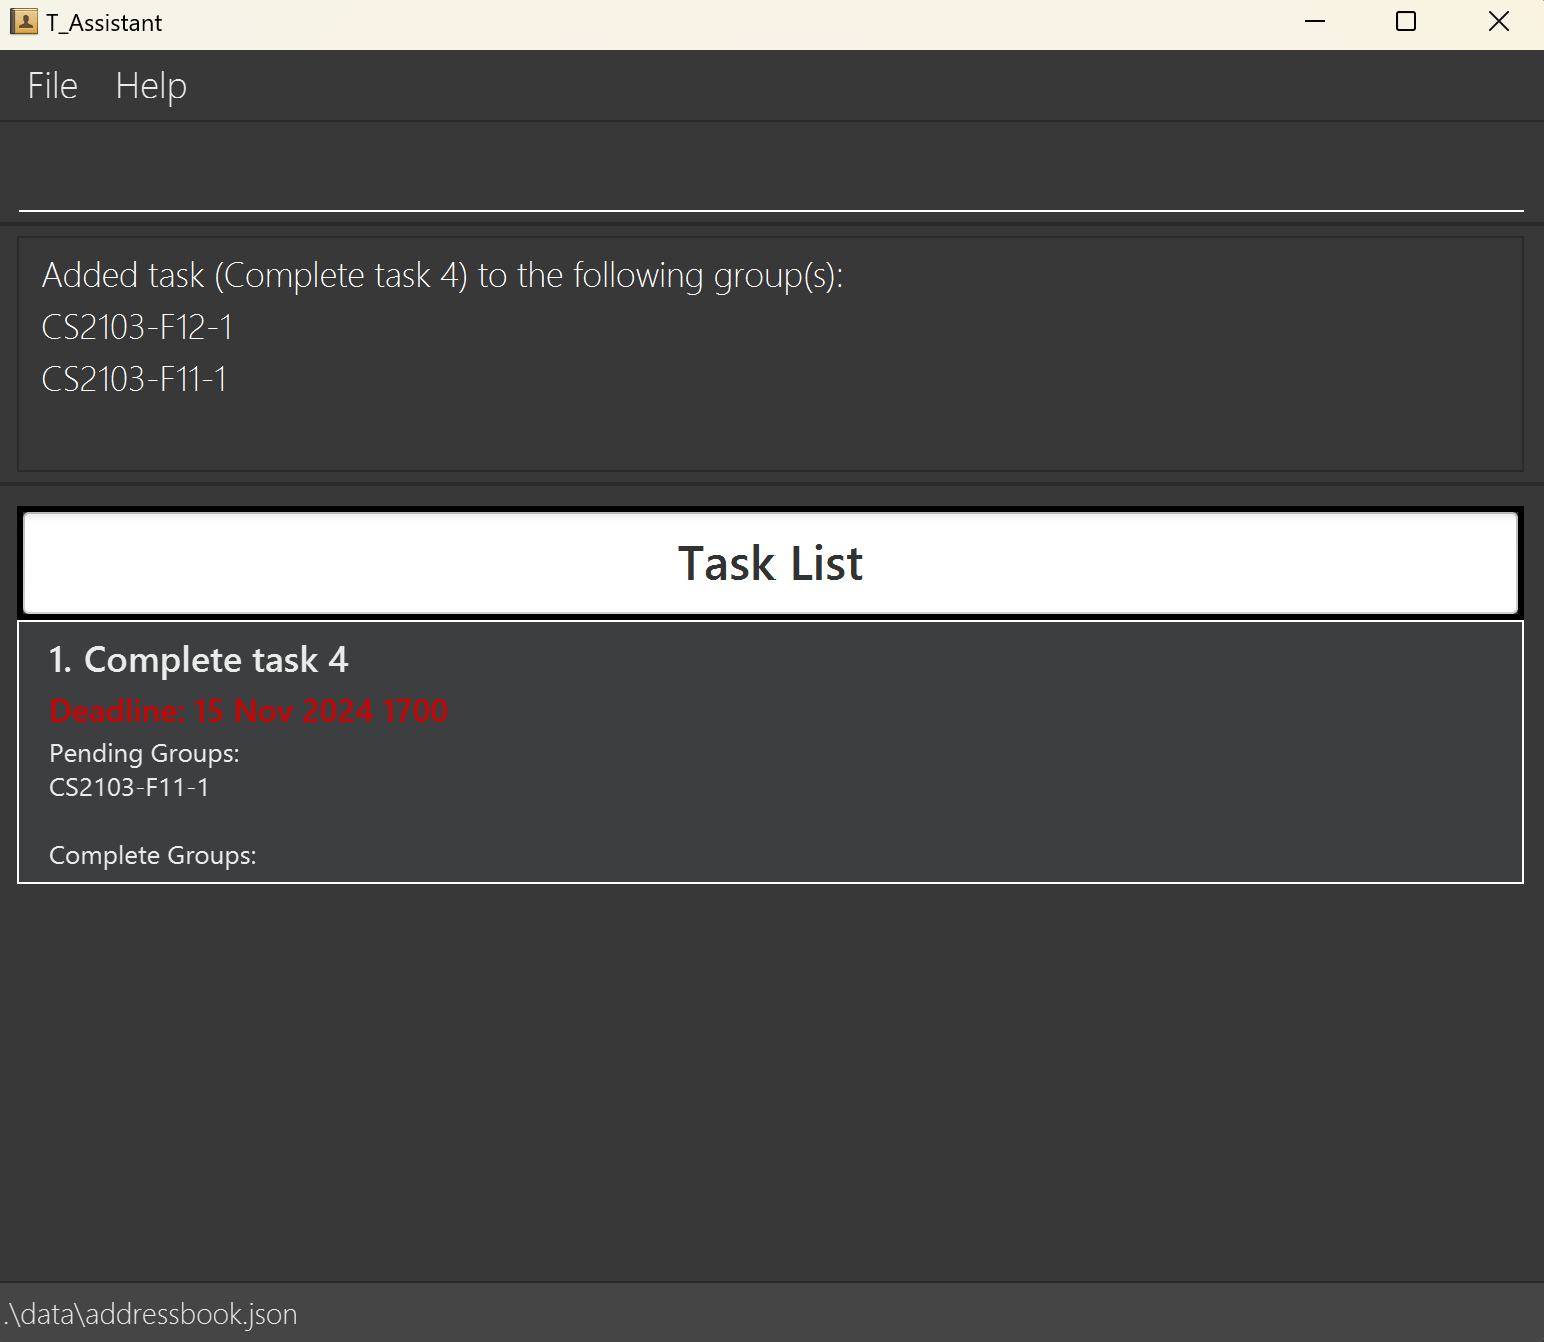
Scenario #1: Adding a task with the name of Complete task 4 and deadline of 2024-11-15 1700 to groups CS2103-F12-1 and CS2103-F11-1
This is the default scenario where the task does not already exist and both groups exist.
- You can begin this command on any panel.
- Type
add_t_g tn/Complete task 4 td/2024-11-15 1700 gn/CS2103-F12-1 gn/CS2103-F11-1.
This screenshot shows the result of executing add_t_g tn/Complete task 4 td/2024-11-15 1700 gn/CS2103-F12-1 gn/CS2103-F11-1.
Adding a Task to ALL Groups: add_t, at
Adds a task to all groups.
Format: add_t tn/TASK_NAME td/TASK_DEADLINE (YYYY-MM-DD HHmm)
Notes
- If the task specified already exists in some groups, it will add the other groups in.
- Returns a filtered view of the task added.
- For information on the constraints for each parameter used in this command, go to Command Parameters.
Usage Scenario
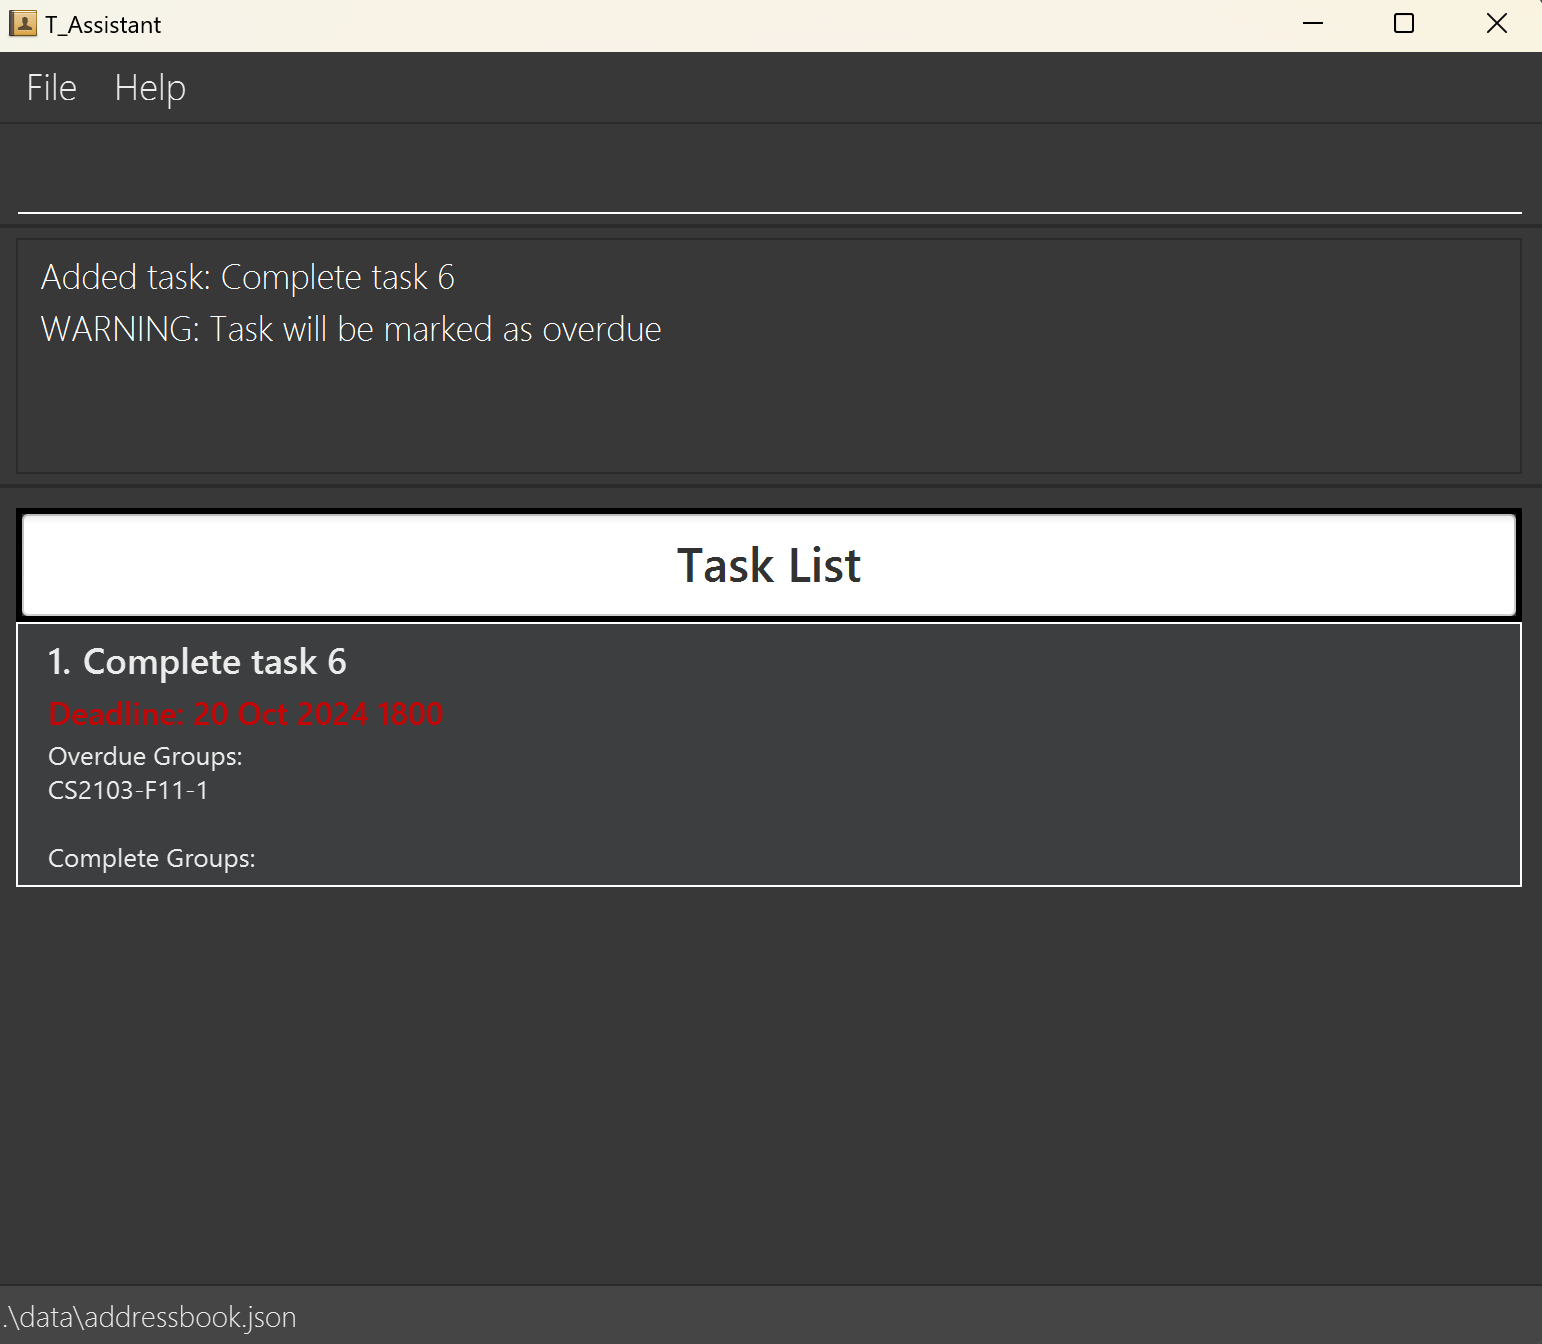
Scenario #1: Executing add_t tn/Complete task 6 td/2024-10-20 1800
- You can begin this command on any panel.
- Type and execute
add_t tn/Complete task 6 td/2024-10-20 1800.
This screenshot shows the result of executing add_t tn/Complete task 6 td/2024-10-20 1800.
Adding an Existing Task to a Group: add_et_g, aetg
Adds an existing task to the groups specified.
Format: add_et_g i/INDEX gn/GROUP_NAME [gn/GROUP_NAME]...
Notes
- This command is case-insensitive.
gn/CS2103-F12-2andgn/cs2103-f12-2will be recognised as the same group. add_et_gadds an existing task identified by the index. It only accepts a valid index based on the list returned whenlist_tis called.- You can add an existing task to multiple groups.
- This command is relatively flexible in terms of the input parameters. You can input duplicate group names or group names that don't exist.
- The application simply ignores the duplicates and adds the task to the desired group.
- Returns a filtered view of the task added to the group(s).
- For information on the constraints for each parameter used in this command, go to Command Parameters.
Usage Scenario
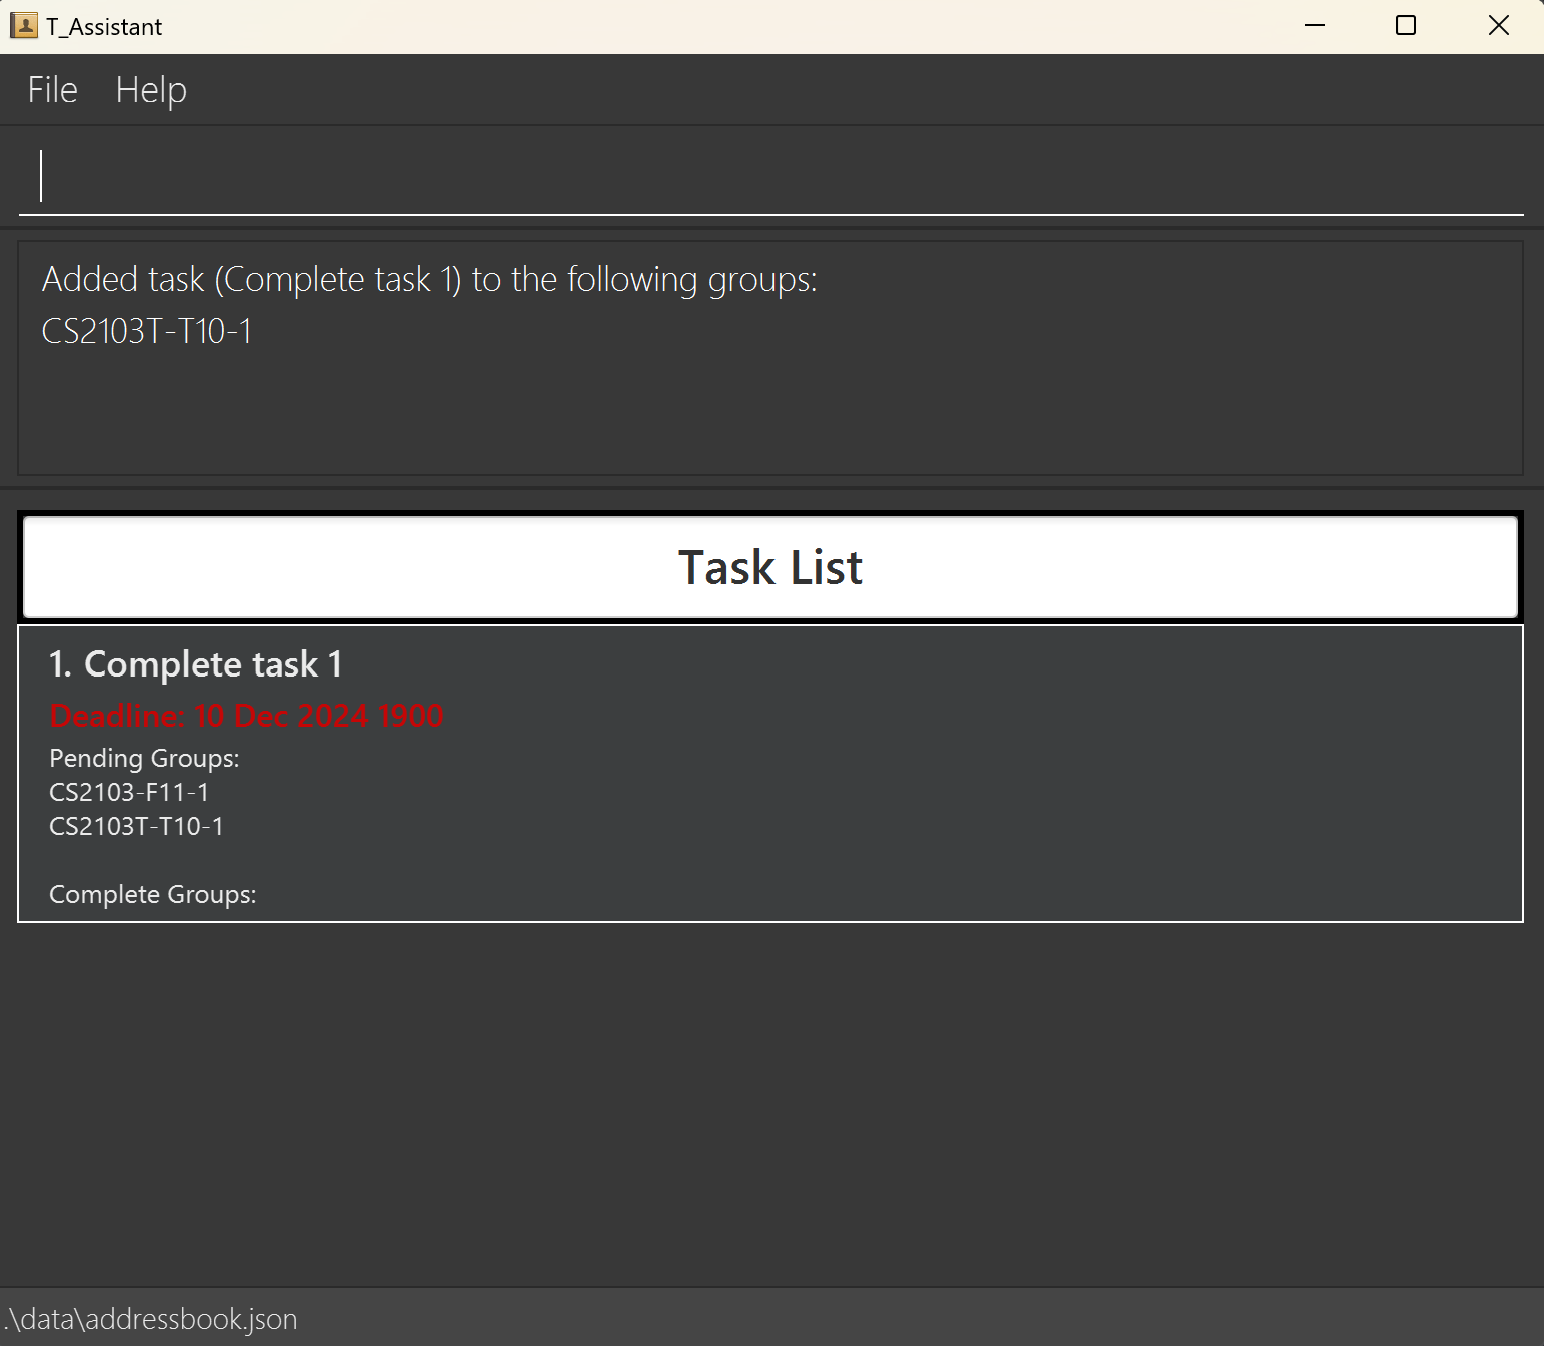
Scenario #1: Adding task in index 1 to CS2103T-T10-1
- Type and execute:
list_tto see the list of tasks. - After finding the task you wish to add, remember its index number (task with index 1 in this example).
- You may wish to execute
list_gto check on the names of groups you wish to add the task to. - Type and execute:
add_et_g i/1 gn/CS2103T-T10-1
This screenshot shows the result of executing add_et_g i/1 gn/CS2103T-T10-1.
Deleting a Task from a Group: del_t_g, dtg
Deletes a task from a group.
Format: del_t_g i/INDEX gn/GROUP_NAME
Notes
- The index must be valid and should be the index of target task in the group's task list.
del_t_gdeletes a task identified by the index. It only accepts a valid index based on the list returned whenlist_t gn/GROUP_NAMEis called, wheregn/GROUP_NAMEis the group of interest.- This command is case-insensitive.
gn/CS2103-F12-2andgn/cs2103-f12-2will be recognised as the same group. - Returns a filtered view of the group the task is deleted from.
- For information on the constraints for each parameter used in this command, go to Command Parameters.
Usage Scenario
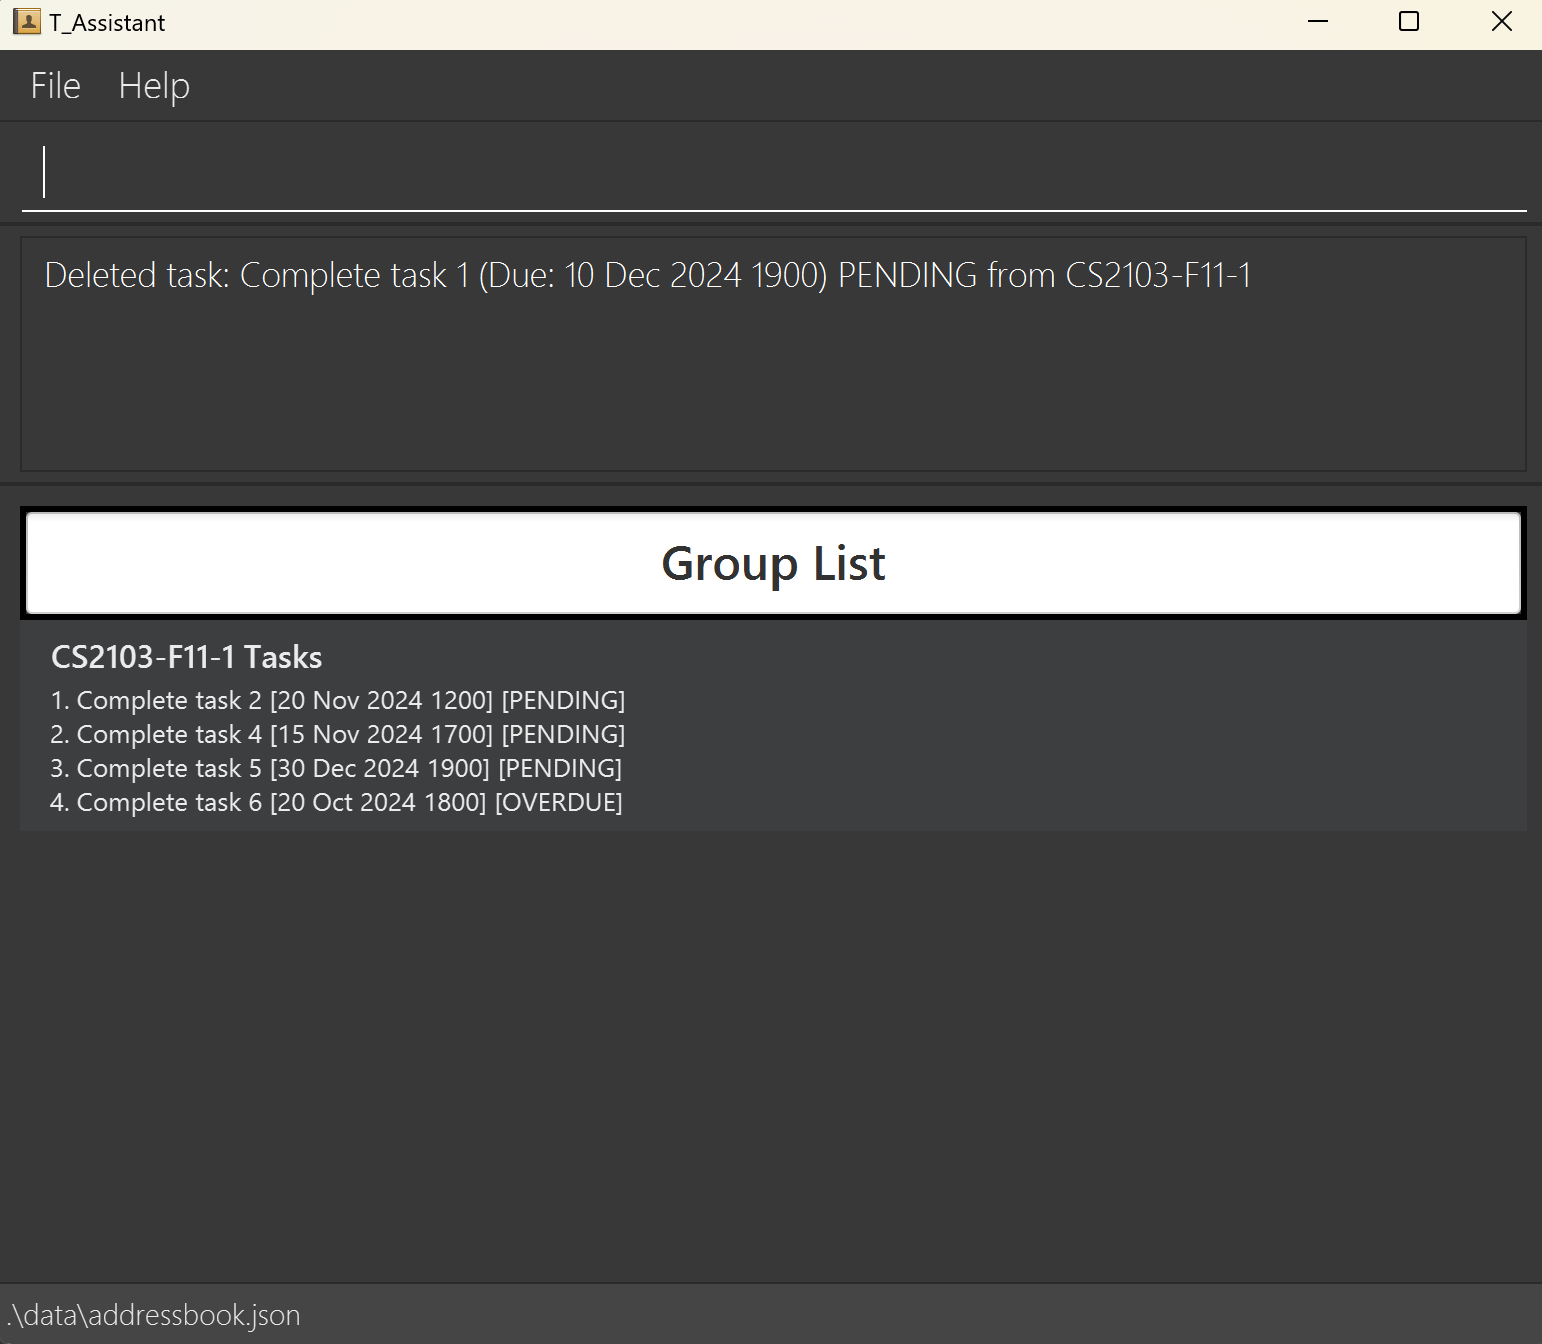
Scenario #1: Deleting task with index 1 from CS2103-F11-1
- Type and execute:
list_t gn/CS2103-F11-1to see the list of tasks inCS2103-F11-1. - After finding the task you wish to delete from this group, remember its index number (task with index 1 in this example).
- Type and execute:
del_t_g i/1 gn/CS2103-F11-1
This screenshot shows the result of executing del_t_g i/1 gn/CS2103-F11-1.
Deleting a Task from ALL Groups: del_t, dt
Delete a task from all groups that contain it.
Format: del_t i/INDEX
Notes
- The index must be valid and should be the index of task list.
del_tdeletes a task identified by the index. It only accepts a valid index based on the list returned whenlist_tis called.- For information on the constraints for each parameter used in this command, go to Command Parameters.
Usage Scenario
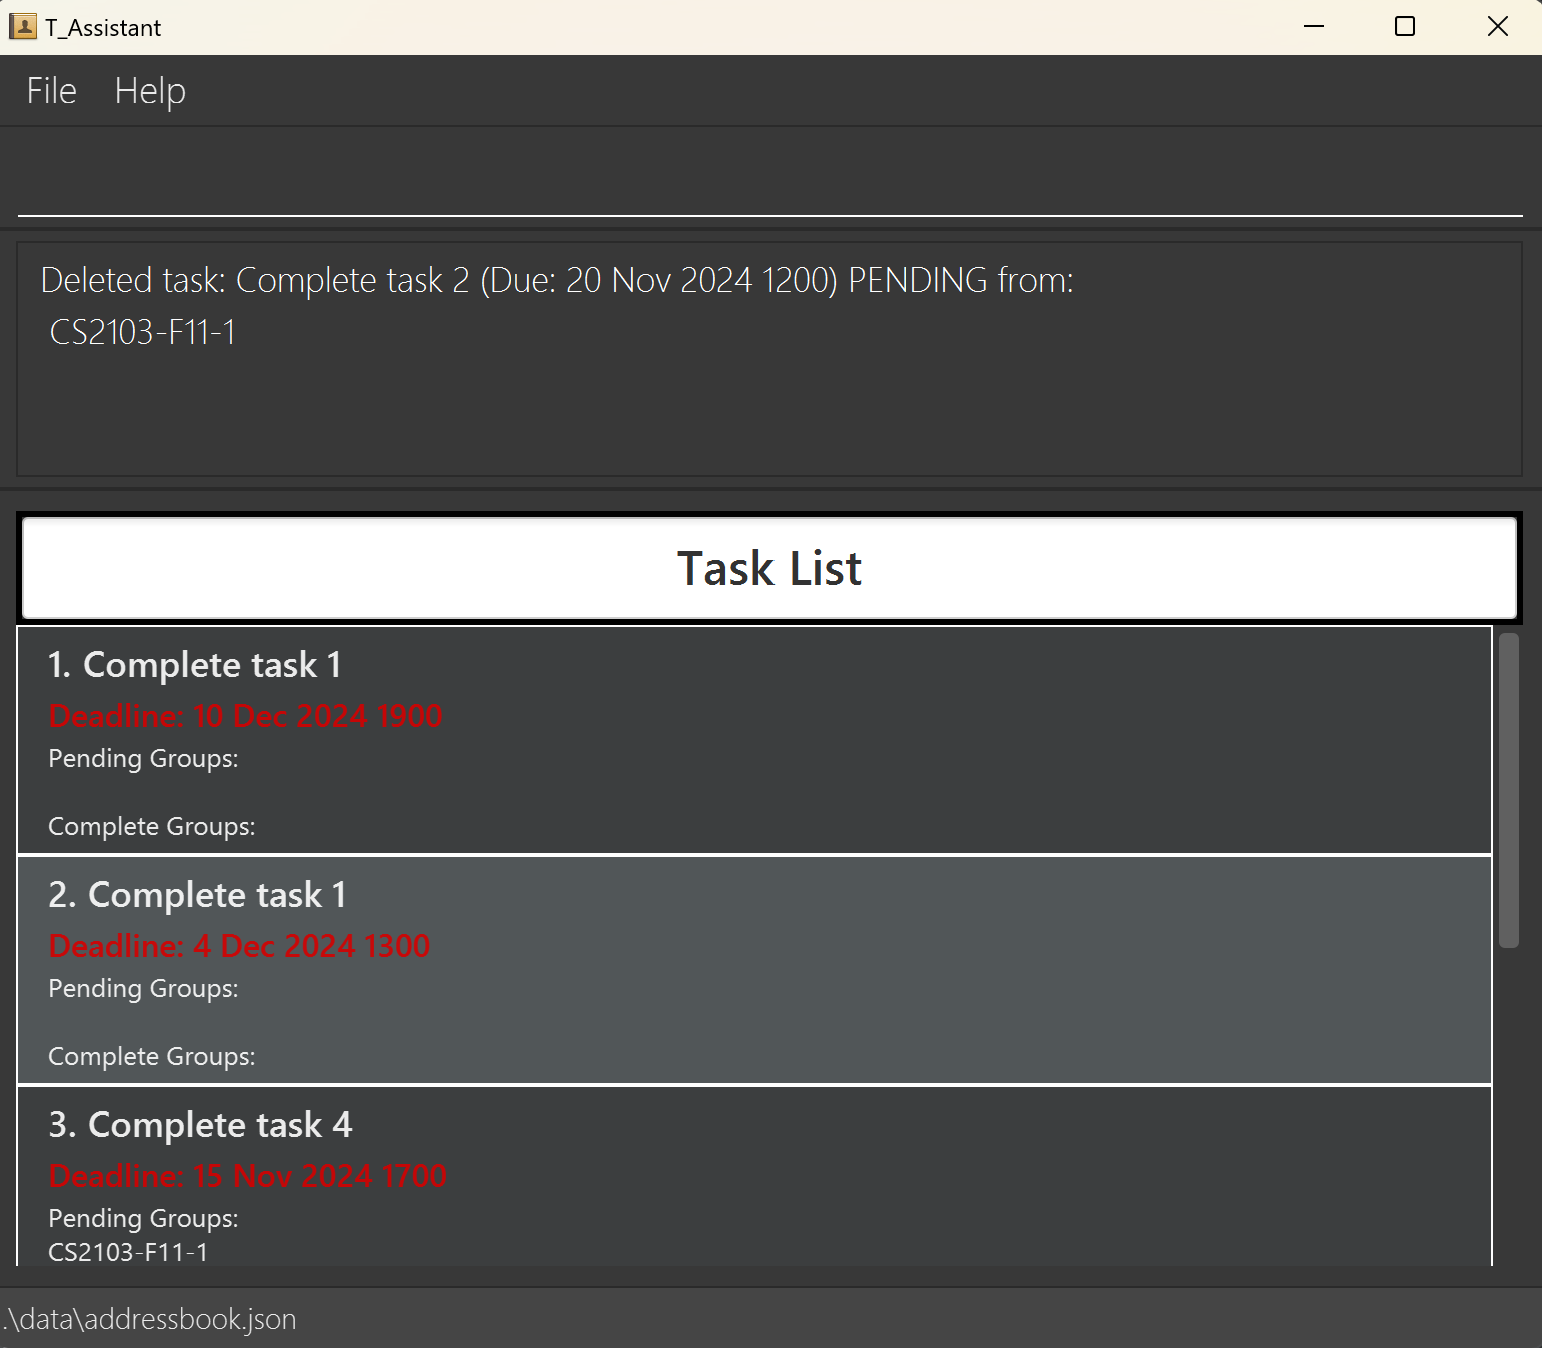
Scenario #1: Deleting task in index 2
- Type and execute:
list_tto see the list of tasks. - Type and execute:
del_t i/2
This screenshot shows the result of executing del_t i/2.
Editing a Task for a Group: edit_t_g, etg
Edits a task from a group.
Format: edit_t_g i/INDEX gn/GROUP_NAME [tn/TASK_NAME] [td/TASK_DEADLINE (YYYY-MM-DD HHmm)]
Notes
- The index must be valid and should be the index of target task in the group's task list.
edit_t_gedits a task identified by the index. It only accepts a valid index based on the list returned whenlist_t gn/GROUP_NAMEis called, wheregn/GROUP_NAMEis the group of interest.Group Namemust exist in the T_Assistant.- At least 1 optional parameter must be provided, else an error will be thrown.
- This command is case-insensitive.
gn/CS2103-F12-2andgn/cs2103-f12-2will be recognised as the same group. - Returns a filtered view of the group the task is edited in.
- For information on the constraints for each parameter used in this command, go to Command Parameters.
Usage Scenario
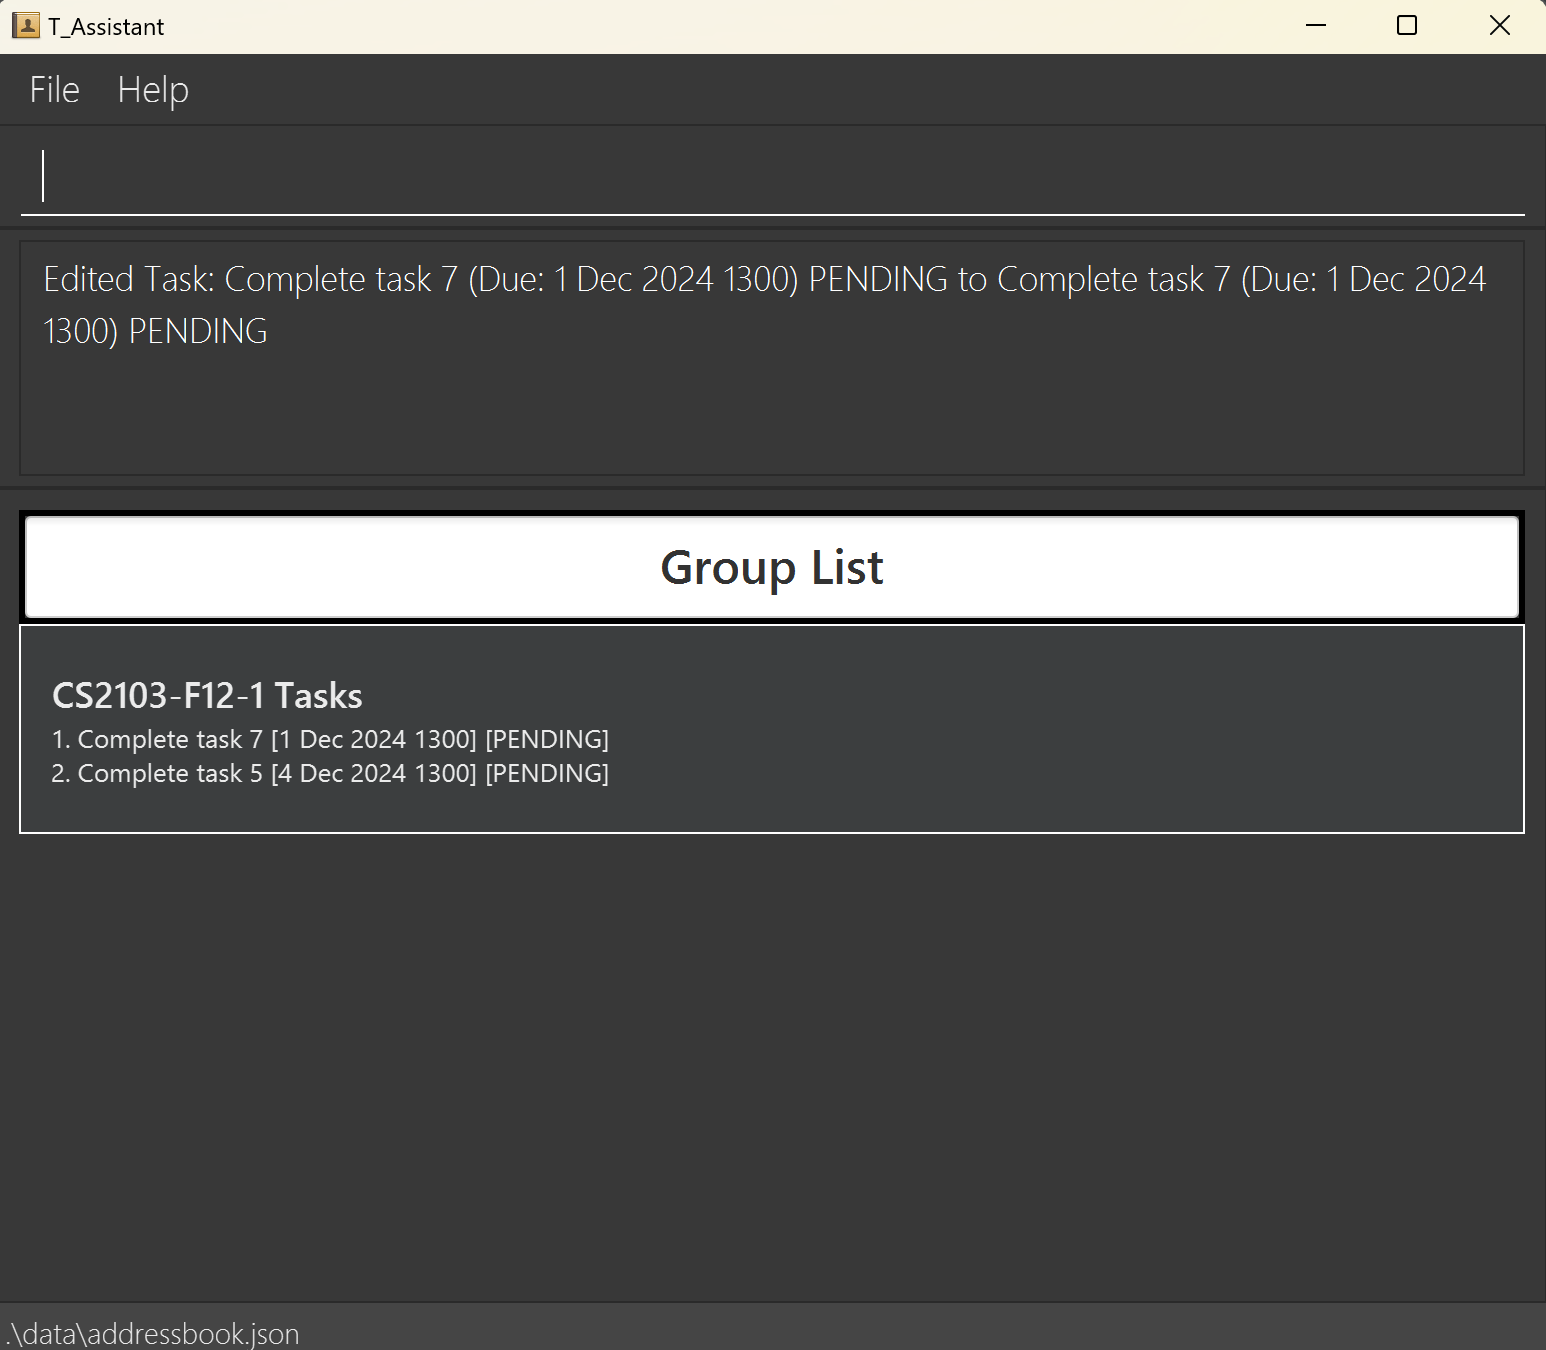
Scenario #1: Editing a task with index 1 in CS2103-F12-1
- Type and execute:
list_t gn/CS2103-F12-1to see the list of tasks inCS2103-F12-1. - After finding the task you wish to edit, type and execute:
edit_t_g i/1 gn/CS2103-F12-1 tn/Complete task 7
This screenshot shows the result of executing edit_t_g i/1 gn/CS2103-F12-1 tn/Complete task 7.
Editing a Task for ALL Groups: edit_t, et
Edits a task from all groups that contain it.
Format: edit_t i/INDEX [tn/TASK_NAME] [td/TASK_DEADLINE (YYYY-MM-DD HHmm)]
Notes
- The index must be valid and should be the index of task list.
edit_tedits a task identified by the index. It only accepts a valid index based on the list returned whenlist_t.- At least 1 optional parameter must be provided, else an error will be thrown.
- There is a known issue for this command, go to Known Issues for more information.
- For information on the constraints for each parameter used in this command, go to Command Parameters.
Usage Scenario
Scenario #1: Editing task in index 2
- Type and execute:
list_tto see the task list. - After finding the task you wish to edit, type and execute:
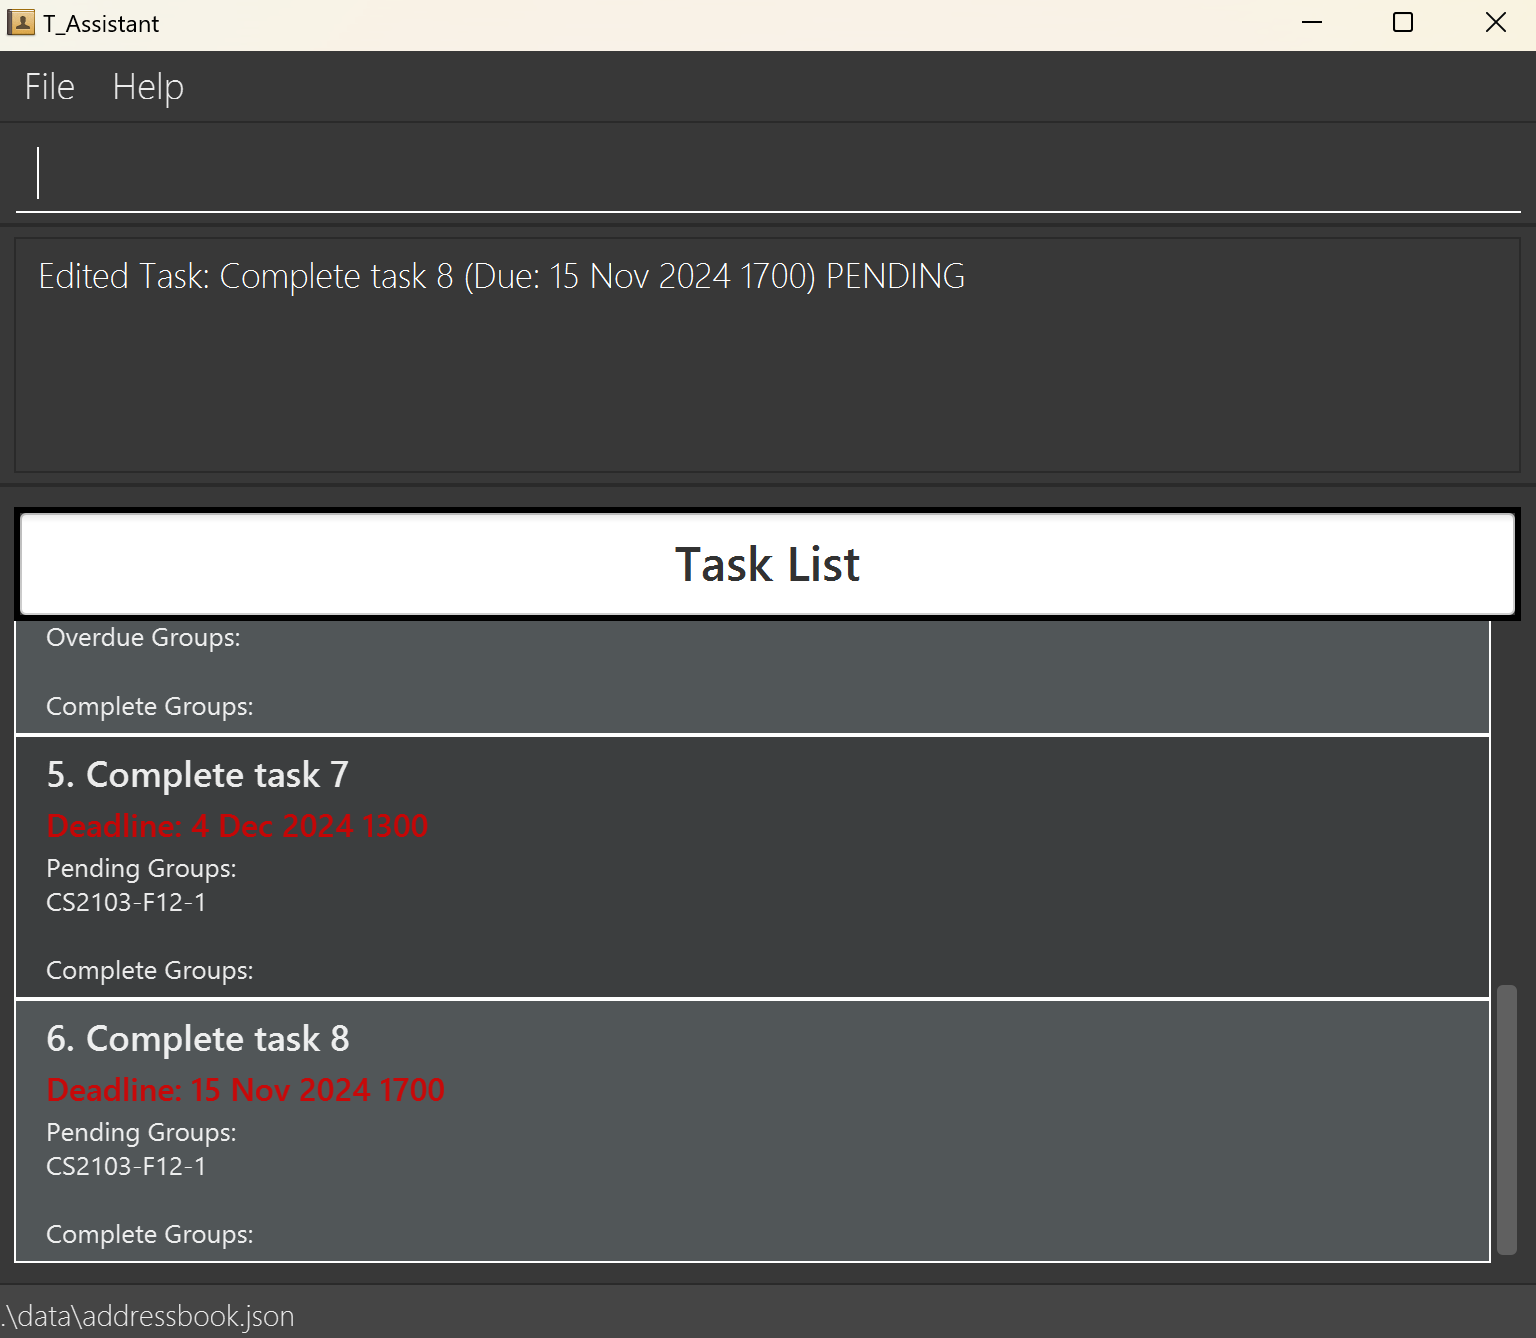
edit_t i/2 tn/Complete task 8
This screenshot shows the result of executing edit_t i/2 tn/Complete task 8.
Mark a Task for a Group: mark_t, mt
Marks a task as done or undone.
Format: mark_t gn/GROUP_NAME i/INDEX
Notes
- The index must be valid and should be the index of target task in the group's task list.
mark_tmarks a task identified by the index. It only accepts a valid index based on the list returned whenlist_t gn/GROUP_NAMEis called, wheregn/GROUP_NAMEis the group of interest.- If a task is complete it will be marked as pending/overdue, and vice versa.
- Returns a filtered view of the group the task is marked at.
- For information on the constraints for each parameter used in this command, go to Command Parameters.
Usage Scenario
Scenario #1: Marking an undone task
Type and execute:
mark_t gn/CS2103-F12-1 i/2Executing
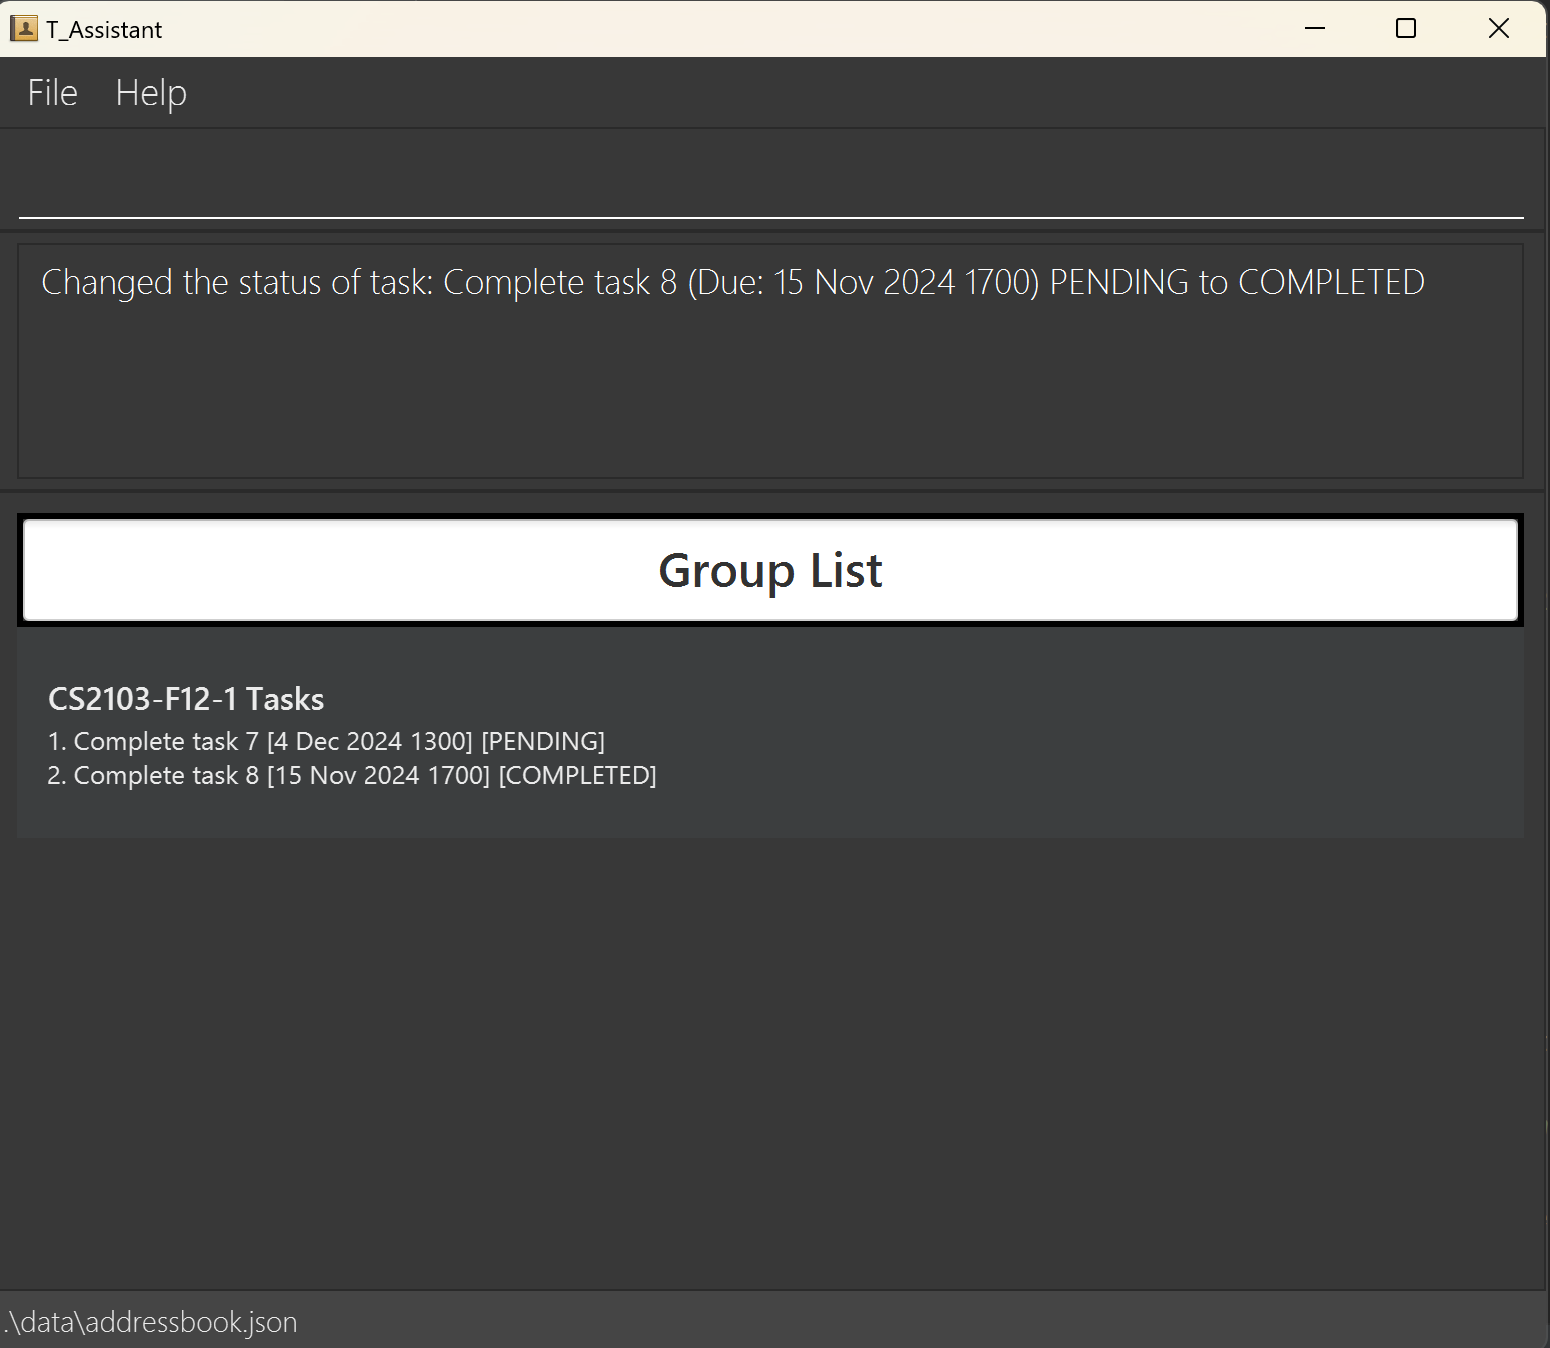
mark_twill mark the task as done.This screenshot shows the result of executing
mark_t gn/CS2103-F12-1 i/2.
Scenario #2: Marking a done task
Type and execute:
mark_t gn/CS2103-F12-1 i/2Executing
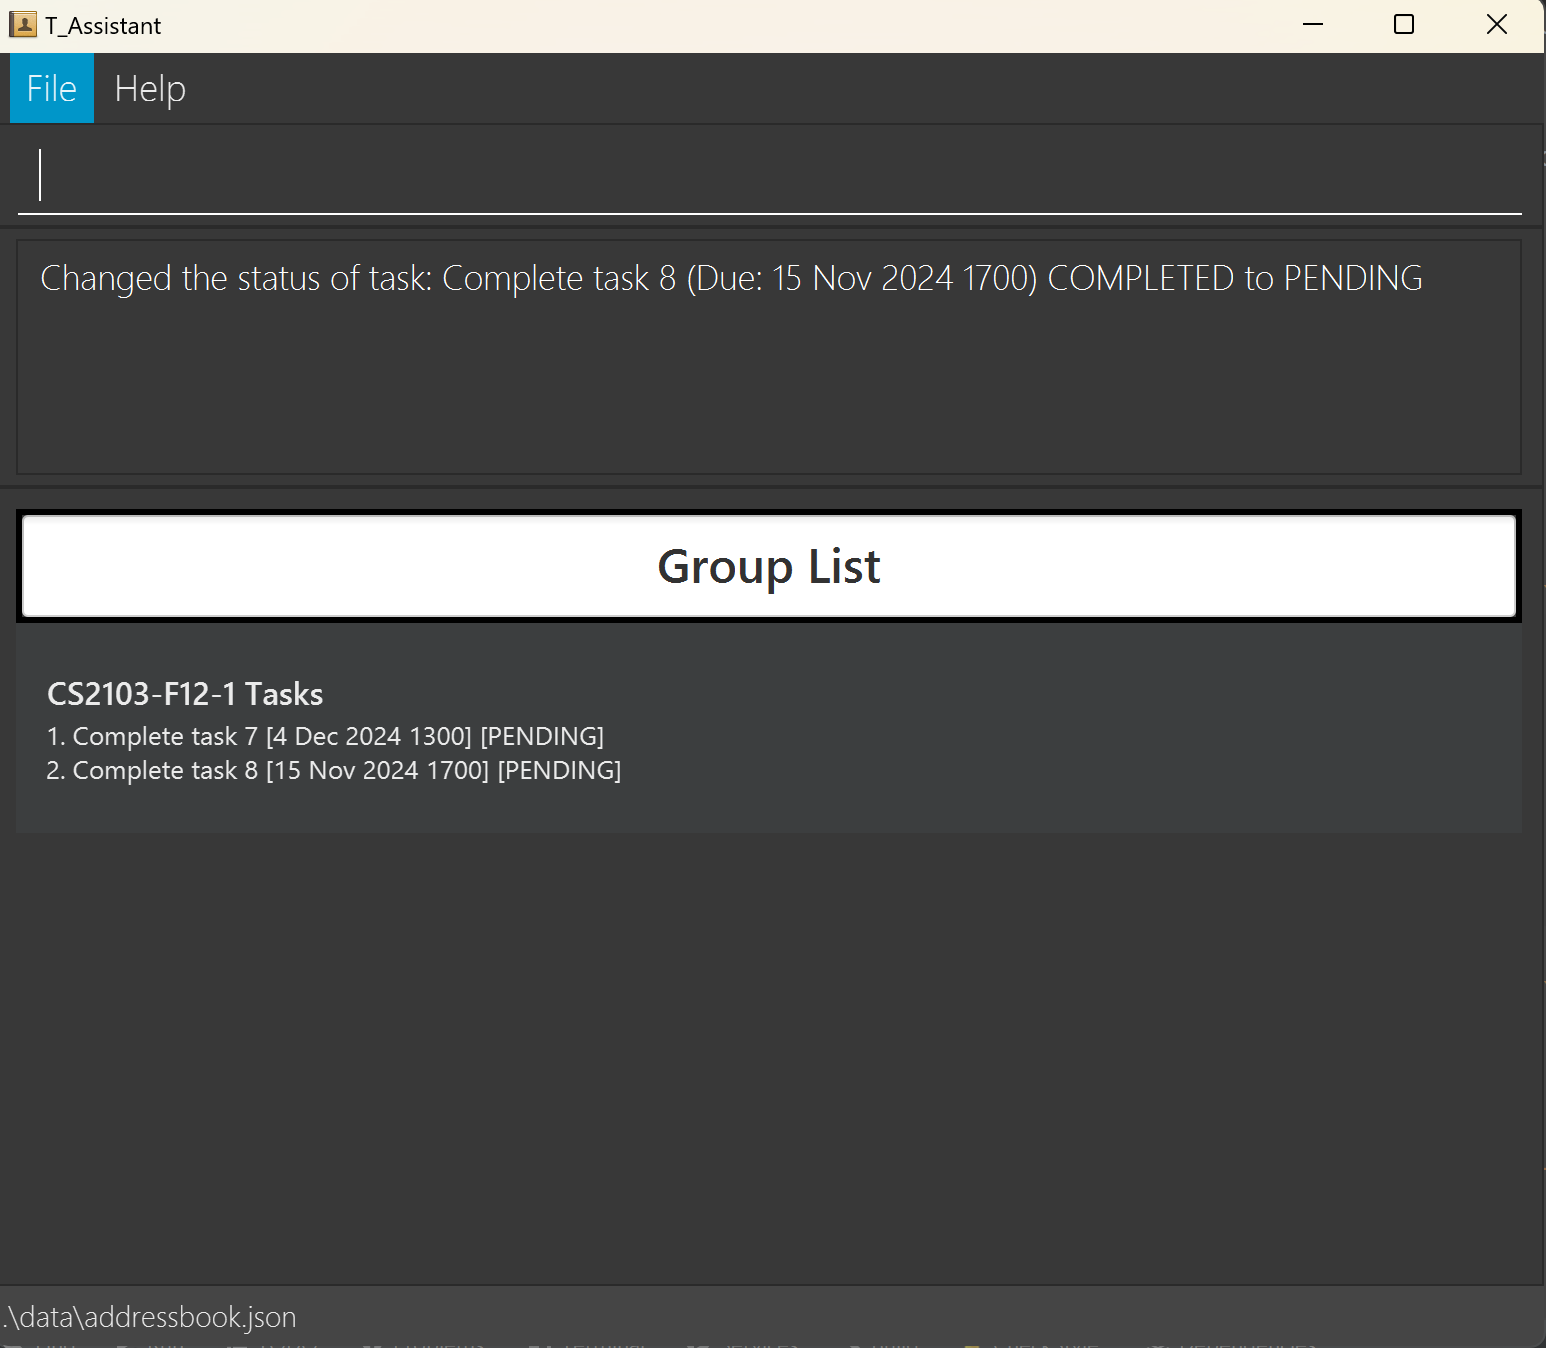
mark_twill mark the task as undone.This screenshot shows the result of executing
mark_t gn/CS2103-F12-1 i/2.
Finding Tasks: find_t, ft
Searches T_Assistant for tasks with fields that match the search query.
Format: find_t q/QUERY [q/QUERY]...
Notes
- This command is case-insensitive.
- The command will match substrings. You may search for part of a task's name such as
tpto findtP v1.6 Release. - A blank query i.e.
ft q/will return all tasks. - This command functions on an OR logic. It will return all tasks that have fields that match any of the queries.
- Searches the following field that a group has that matches the query:
- Task name
- For information on the constraints for each parameter used in this command, go to Command Parameters.
Usage Scenario
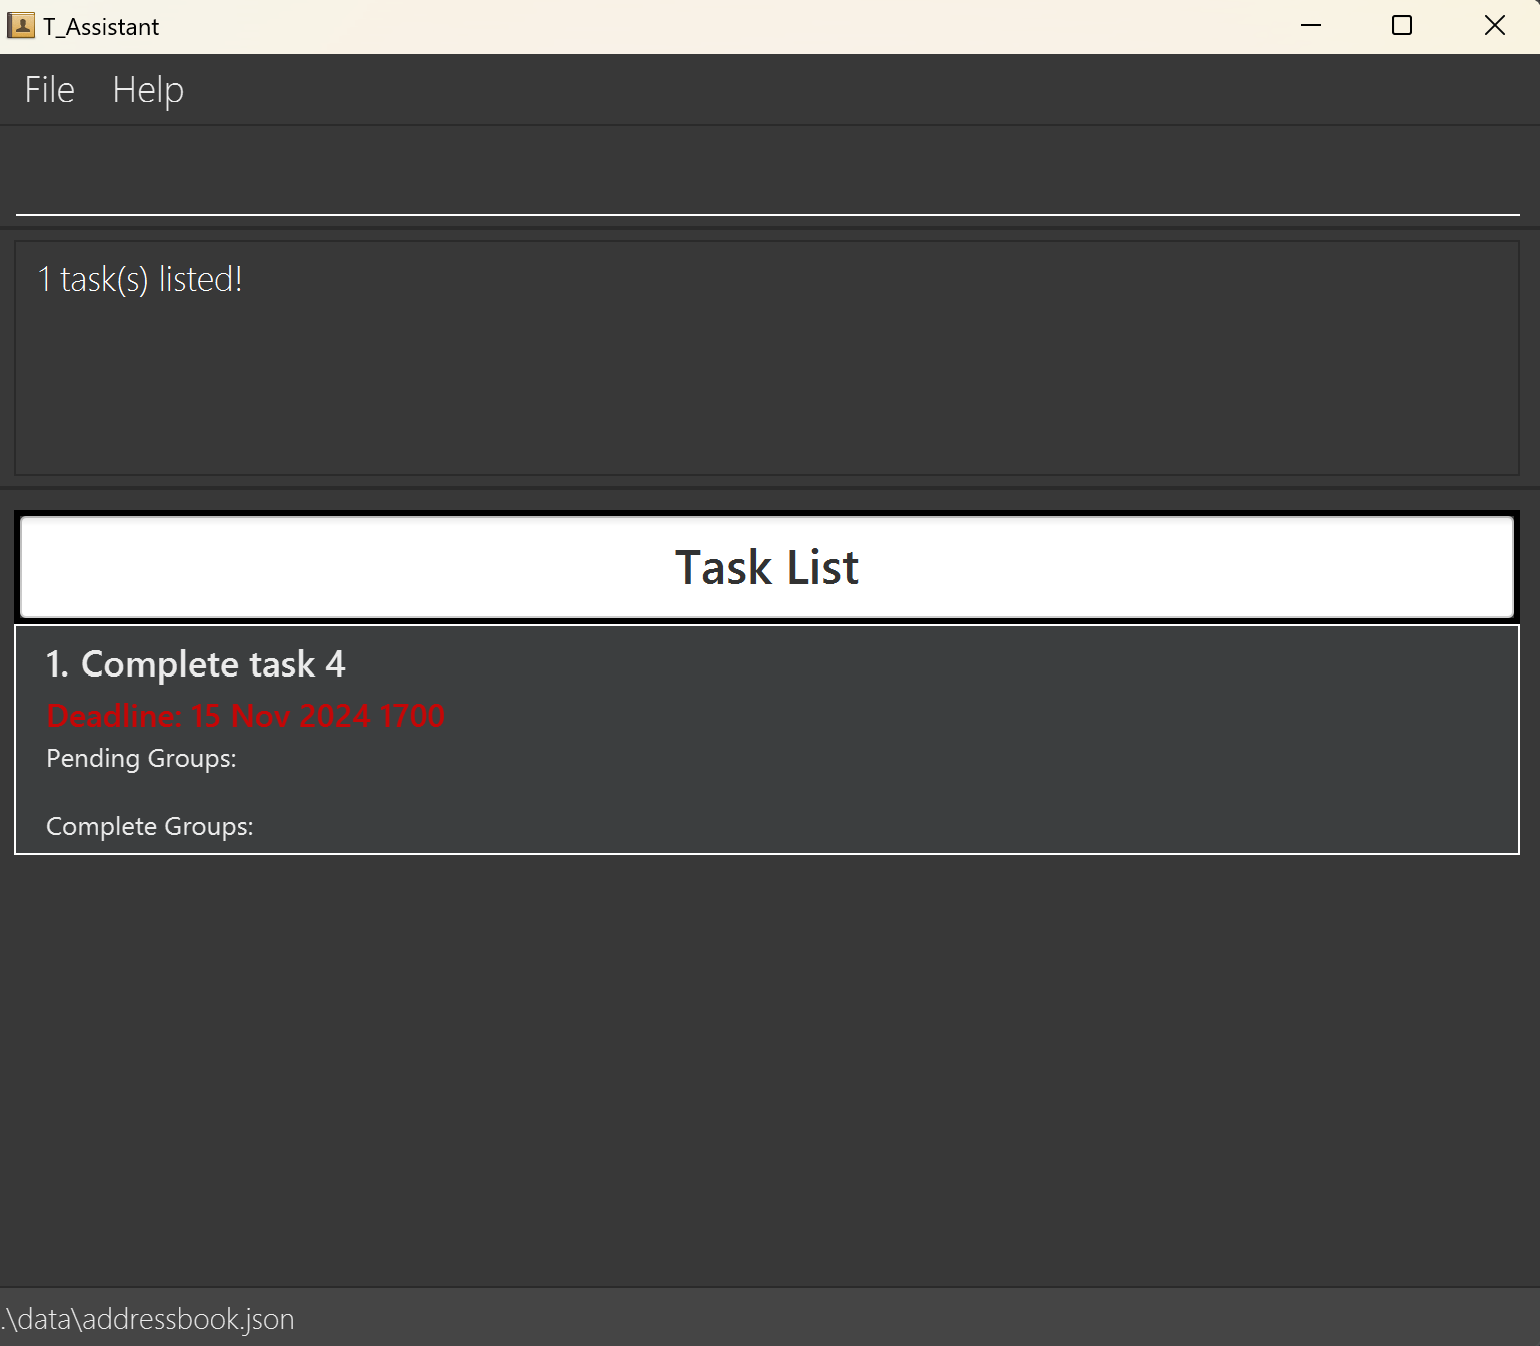
Scenario #1: Finding tasks with the following query: 4
This screenshot shows the result of executing find_t q/4.
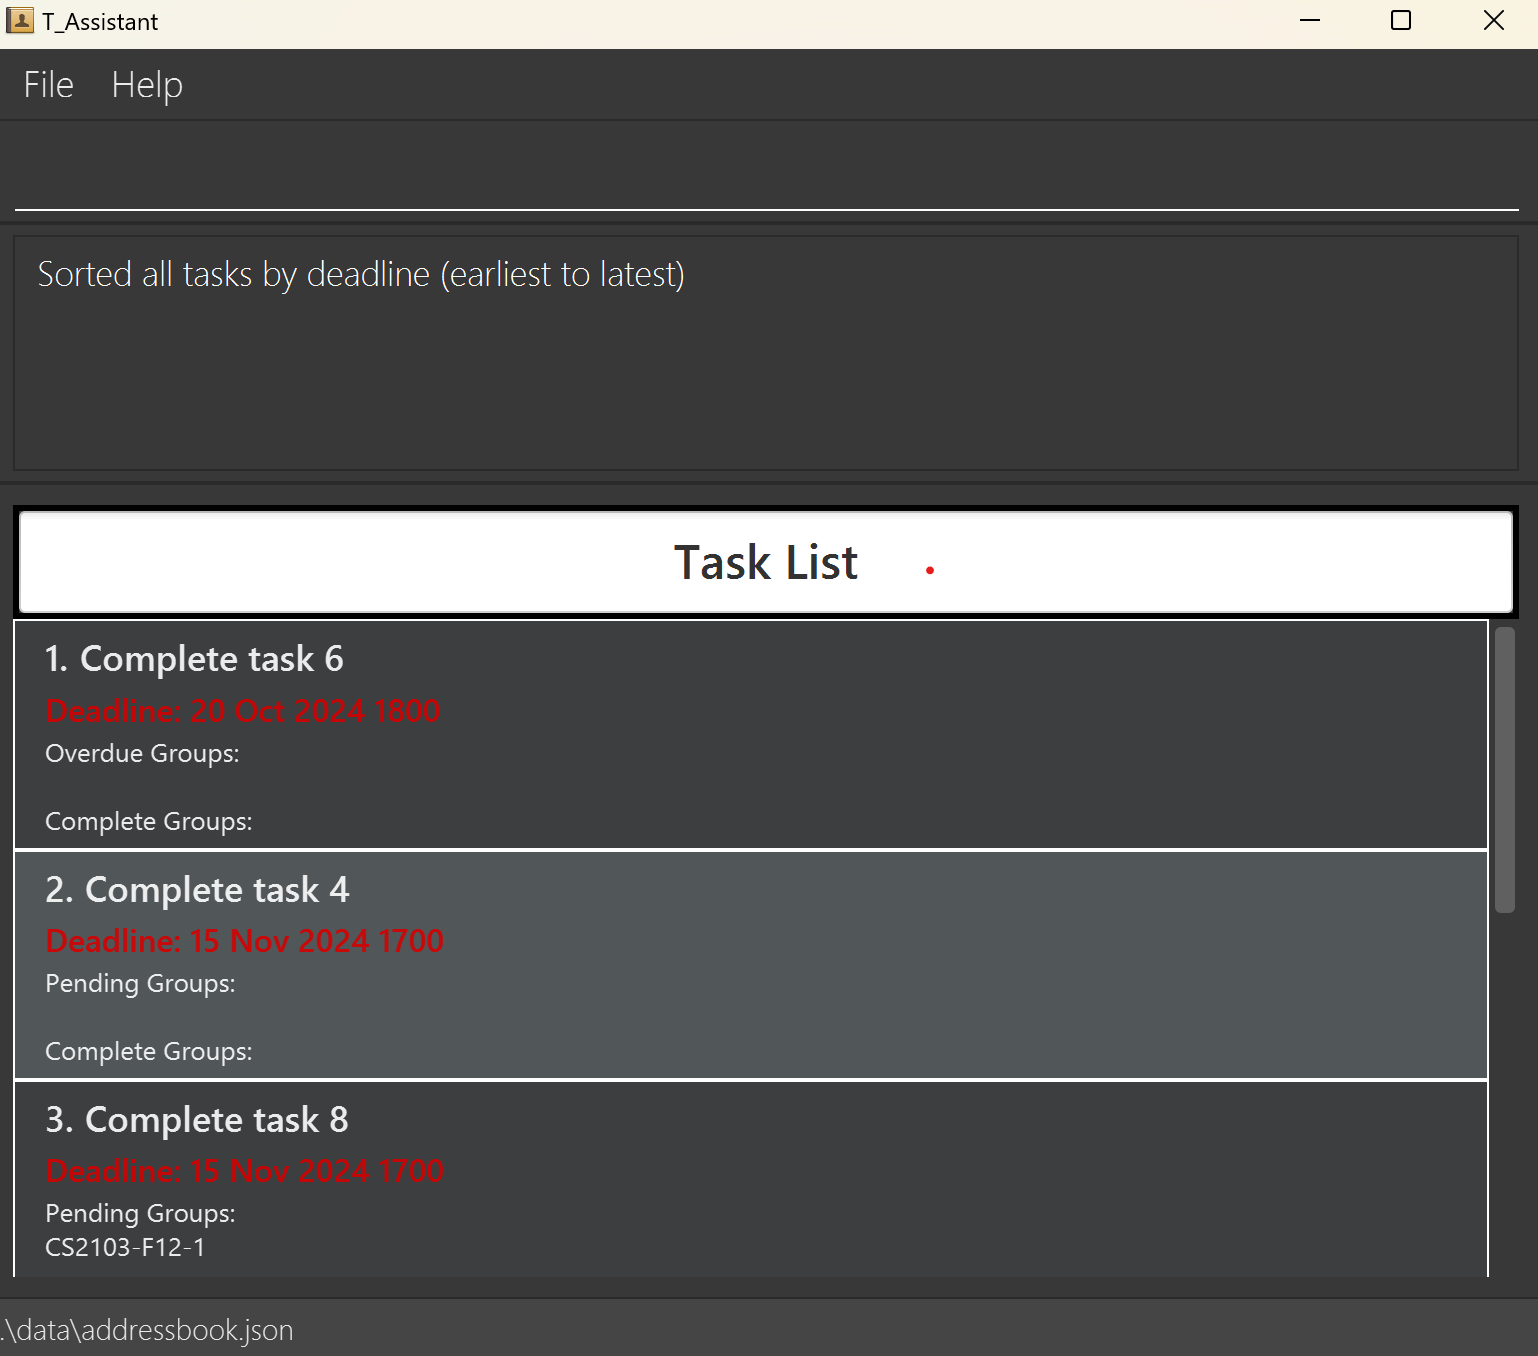
Sorting Tasks: sort_t, st
Sorts the task list by deadline from the earliest to the latest date.
Format: sort_t
This screenshot shows the result of executing sort_t.
Miscellaneous Commands
Undoing change: undo
Undoes the previous command ran.
Format: undo
Notes
- If it is your first time opening the application, you will be unable to undo because there is no data to undo. You can only undo after you have made changes to the application.
- You can only undo the commands which make changes to the application (add, delete, sort, mark, clear, edit commands), and not the commands which do not make any changes (find, list, help, exit commands).
- For every change you make within the application, it will be added to the version history of the application.
- The application stores up to 100 version histories. Hence, you will only be able to undo up to 100 of your most recent versions.
- After running the command you will be brought to the default panel of the application (the student list panel).
Redoing change: redo
Redoes the previously undone command.
Format: redo
Notes
- If it is your first time opening the application, you will be unable to redo because there is no data to redo. You can only redo the application after at least one undo has been executed.
- You can only redo the commands which make changes to the application (add, delete, sort, mark, clear, edit commands), and not the commands which do not make any changes (find, list, help, exit commands).
- After running the command you will be brought to the default panel of the application (the student list panel).
Viewing help : help
Shows a message explaining how to access the help page.

Format: help
Clearing all entries : clear
Clears all entries from the assistant.
Format: clear
Exiting the program : exit
Exits the program.
Format: exit
Data Handling
Saving the data
T_Assistant data are saved in the hard disk automatically after any command that changes the data. There is no need to save manually.
Editing the data file
T_Assistant data are saved automatically as a JSON file [JAR file location]/data/addressbook.json. Advanced users are
welcome to update data directly by editing that data file.
Caution:
If your changes to the data file makes its format invalid, T_Assistant will discard all data and start with an empty
data file at the next run. Hence, it is recommended to take a backup of the file before editing it.
Furthermore, certain edits can cause the T_Assistant to behave in unexpected ways (e.g., if a value entered is outside
the acceptable range). Therefore, edit the data file only if you are confident that you can update it correctly.
Changes done directly to the data file will NOT be registered by the application, i.e. undo/redo will not register these changes.
FAQ
Q: How do I transfer my data to another Computer?
A: Install the app in the other computer and overwrite the empty data file it creates with the file that contains
the data of your previous T_Assistant home folder and also copy over versionHistory.json if you wish to keep it.
Known issues
- When using multiple screens, if you move the application to a secondary screen, and later switch to using only
the primary screen, the GUI will open off-screen. The remedy is to delete the
preferences.jsonfile created by the application before running the application again. - If you minimize the Help Window and then run the
helpcommand (or use theHelpmenu, or the keyboard shortcutF1) again, the original Help Window will remain minimized, and no new Help Window will appear. The remedy is to manually restore the minimized Help Window. - The application will sometimes open to a blank screen with no information displayed, simply run any commands and the application should function as per normal.
- When running edit task for all groups
et, if a group has completed the task, their status will be reset to pending or overdue. The remedy is to runetgsuch that you create a new task for the groups with completed status before editing the task.
Glossary
| Key Terms | Definition |
|---|---|
| Mainstream OS | Operating Systems (i.e. Windows, Linux, MacOS |
| JAR | Executable file containing Java classes and other resources. |
| Prefix | Keyword used in commands to specify the parameter type |
| Student Number | Unique identifier for a student |
Command Parameters
This section will inform you about what parameters are used in T_Assistant and their restrictions 😃
| Parameter | Constraints | Correct | Incorrect |
|---|---|---|---|
sno/Student Number | Start with A0 Followed by 6 numerical digits End with any letter | A0123456B | A1234567 A1234567A |
sn/Student Name | Only contain alphanumeric characters, a variety of latin characters and spaces, and it should not be blank | John Doe | J0hn Doe$$ |
e/ | Format: local-part@domain-partlocal-part should contain only alphanumeric characters and the following special characters _, . local-part cannot start and end with special charactersdomain-part must end with u.nus.edu | johndoe@u.nus.edu ,john_doe@u.nus.edu | $johndoe@u.nus.edu johndoe@gmail.com |
t/Tag | Only contain alphanumeric characters | TD8 | TD 8 Great at UI |
gn/Group Name | Format: [Module]-[Tutorial Group]-[Group Number]Module can be either CS2103 or CS2103TTutorial Group should be one letter followed by a positive integerGroup Number should be a positive integerInteger are supported up to 2147483647 | CS2103-F12-2CS2103T-W1-5 | CS2103A-1-A1CS2040S-A1-1 |
tn/Task Name | Cannot be blank | Release tP v1.6 | |
td/Task Deadline | Must be in the following format: YYYY-MM-DD HHmmRelative to Singapore's timezone | 2024-11-09 1800 | today 2024-1-9 1900 2024-01-09 800 |
q/Query | No limitations | iPtP v1.5 | |
i/Index | Must be positive integer | 110 | -1test |
Command Summary
Student
| Action | Format, Examples |
|---|---|
| List Students | list_s/ls |
| Add Student | add_s/as sno/STUDENT_NUMBER sn/STUDENT_NAME e/EMAIL [t/TAG]...e.g., as sno/A0123456A sn/James Ho e/e0123456A@u.nus.edu t/TD9 |
| Delete Student | del_s/ds sno/STUDENT_NUMBERe.g., ds sno/A0123456A |
| Edit Student | edit_s/es i/INDEX [sn/STUDENT_NAME] [e/EMAIL] [t/TAG]...e.g., es i/1 sno/A0123456A sn/James Ho Ting Kang |
| Add Student to Group | add_s_g/asg sno/STUDENT_NUMBER gn/GROUP_NAMEe.g., asg sno/A0123456A gn/CS2103-F12-2 |
| Delete Student From Group | del_s_g/dsg sno/STUDENT_NUMBERe.g., dsg sno/A0123456A |
| Find Student | find_s/fs q/QUERY [q/QUERY]...e.g., fs q/James |
| Sort Students | sort_s/ss |
Group
| Action | Format, Examples |
|---|---|
| List Groups | list_g/lg |
| Add Group | add_g/ag gn/GROUP_NAME [gn/GROUP_NAME]...e.g., ag gn/CS2103-F12-2 gn/CS2103-F12-1 |
| Delete Group | del_g/dg gn/GROUP_NAMEe.g., dg gn/CS2103-F12-2 |
| Edit Group | edit_g/eg i/INDEX gn/GROUP_NAMEe.g., eg i/1 gn/CS2103-F12-3 |
| Find Group | find_g/fg q/QUERY [q/QUERY]...e.g., fg q/CS2103-F12-2 |
| Sort Groups | sort_g/sg |
Task
| Action | Format, Examples |
|---|---|
| List Task | list_t/lt [gn/GROUP_NAME]e.g., lt, lt gn/CS2103-F12-2 |
| Add Task to Group | add_t_g/atg tn/TASK_NAME td/TASK_DEADLINE (YYYY-MM-DD HHmm) gn/GROUP_NAME [gn/GROUP_NAME]...e.g., atg tn/v1.5 Release td/2024-11-07 2359 gn/CS2103-F12-2 |
| Add Task to All Groups | add_t/at tn/TASK_NAME td/TASK_DEADLINE (YYYY-MM-DD HHmm)e.g., at tn/Submit Postmortem td/2024-10-20 1800 |
| Add Existing Task to Group | add_et_g/aetg i/INDEX gn/GROUP_NAME [gn/GROUP_NAME]...e.g., aetg i/1 gn/CS2103-F12-3 |
| Delete Task from All Groups | del_t/dt i/INDEXe.g., dt i/1 |
| Delete Task from Group | del_t_g/dtg i/INDEX gn/GROUP_NAMEe.g., dtg i/1 gn/CS2103-F12-2 |
| Edit Task for Group | edit_t_g/etg i/INDEX gn/GROUP_NAME [tn/TASK_NAME] [td/TASK_DEADLINE (YYYY-MM-DD HHmm)] e.g., etg i/1 gn/CS2103-F12-3 tn/v1.4 Release |
| Edit Task for All Groups | edit_t/et i/INDEX [tn/TASK_NAME] [td/TASK_DEADLINE (YYYY-MM-DD HHmm)]e.g., et i/1 td/2024-11-20 1200 |
| Mark Task | mark_t/mt gn/GROUP_NAME i/INDEXe.g., mt gn/CS2103-F12-2 i/2 |
| Find Task | find_t/ft q/QUERY [q/QUERY]...e.g., ft q/v1.3 Release |
| Sort Tasks | sort_t/st |
Misc.
| Action | Format, Examples |
|---|---|
| Help | help |
| Clear | clear |
| Undo | undo |
| Redo | redo |
| Exit | exit |